How to Build
Building your Unity project allows you to compile your game into an executable file so you can test it on actual devices or publish it to storefronts. This guide walks you through compiling your project for Android, covering both APK (for local testing) and AAB (for publishing) formats.
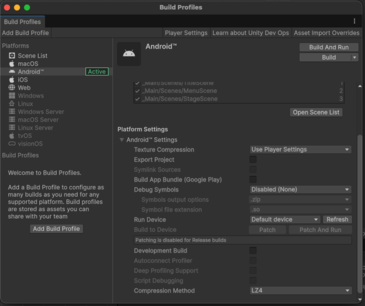
You can quickly open the Build Profiles window at any time by pressing Ctrl + Shift + B (Windows) or Cmd + Shift + B (Mac), or by navigating to File > Build Profiles.
To begin, select your target platform (e.g., Android) from the platform list and click Switch Platform.

Android Builds
You can build your Android project in two different formats. Because the initial setup for both formats is identical, we will set up the Player and Keystore settings first, and then choose our build format at the very end.
Step 1: Configure Player Settings
- Open the Build Profiles window.
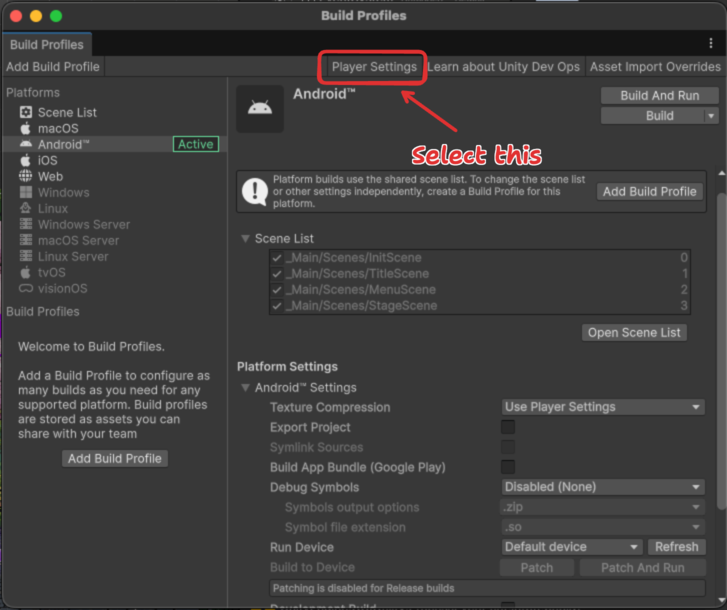
- Click on the Player Settings button.
- When the Player Settings window appears, ensure the Android tab (the robot icon) is selected.
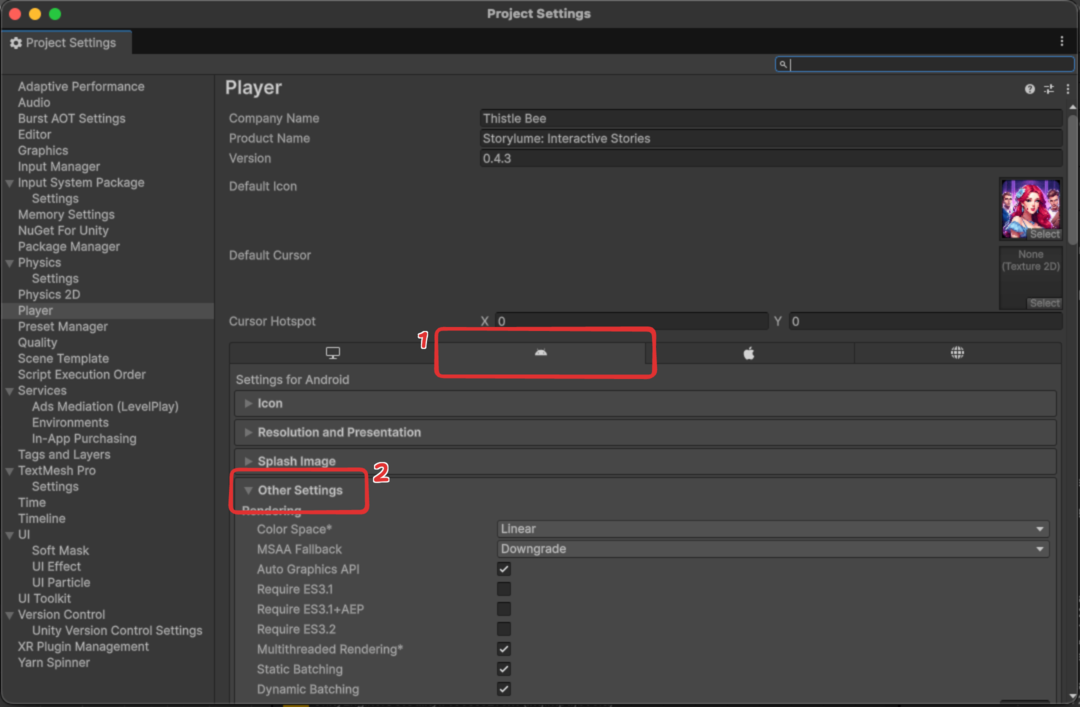
- Scroll down and expand the Other Settings section.
Step 2: Set Project Versions
Scroll down within Other Settings until you find the Version and Bundle Version Code fields. It is crucial to update these numbers before creating a new build.
Version Parameters:
| Parameter | Format | Description | Example |
|---|---|---|---|
| Version | X.Y.Z | Represents the Major (X), Minor (Y), and Patch (Z) numbers of your game. | 1.0.2 |
| Bundle Version Code | YYYYMMDDHH | A numeric code based on the current date and time (Year, Month, Day, Hour). | 2025050313 |
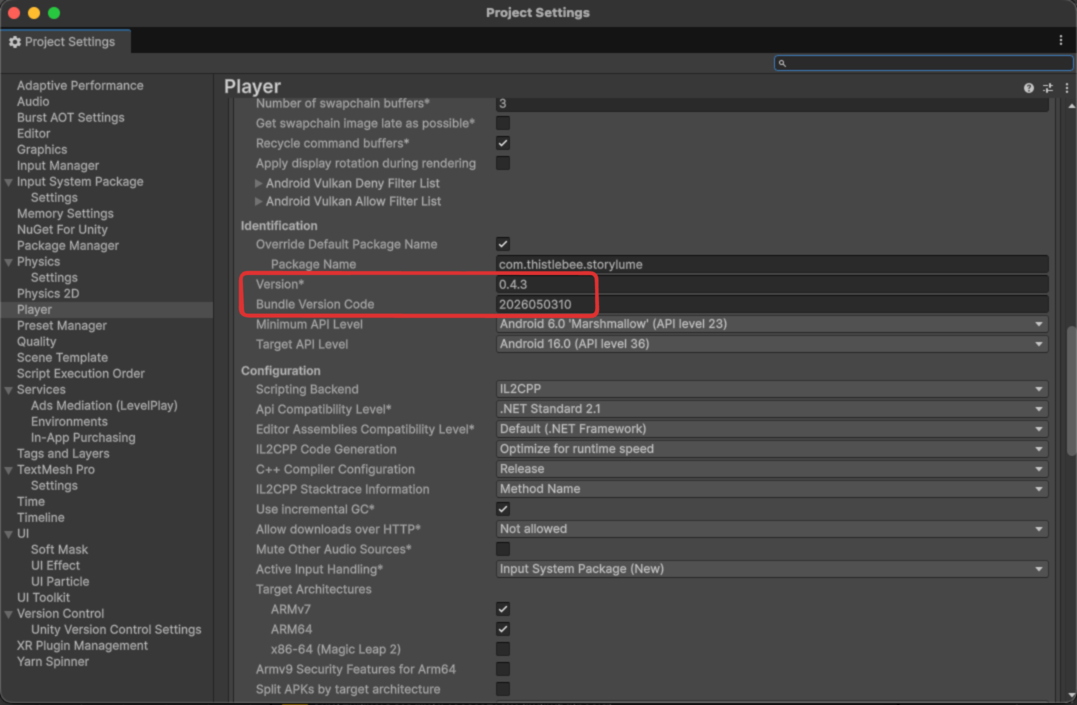
Using the YYYYMMDDHH format for your Bundle Version Code guarantees a unique, incrementally higher number for every build. The Google Play Store requires every new upload to have a strictly higher Bundle Version Code than the last!
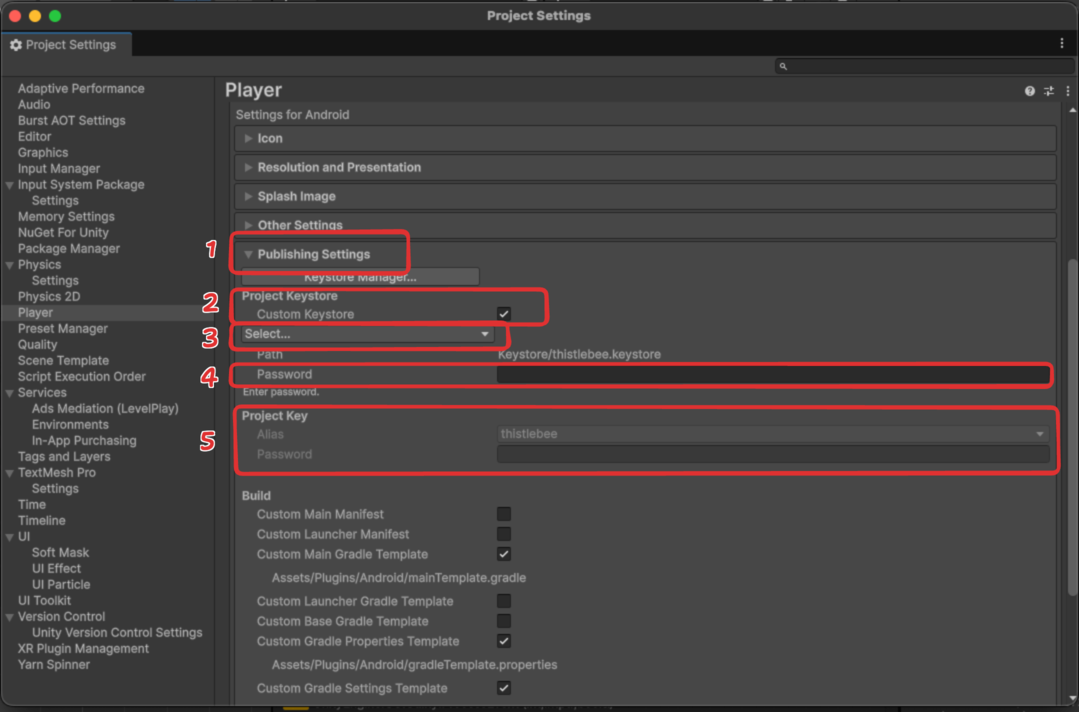
Step 3: Configure Publishing & Keystore Settings
Before building, you must sign your app using the project's custom Keystore.
- Scroll down to the Publishing Settings section.
- Check the box to enable Custom Keystore.
- Click Select and locate
thistlebee.keystore(found inside theKeystorefolder in your project directory). - Enter the required credentials below to unlock the Project Key section:
Keystore Parameters:
| Parameter | Value |
|---|---|
| Keystore Password | successful |
| Project Key Alias | thistlebee |
| Project Key Password | successful |
If everything is entered correctly, you can safely close the Player Settings window and return to the Build Profiles window.
Step 4: Choose Format and Build
Depending on your goal, you will now choose to build either an APK or an AAB.
Option A: Building an APK (For Local Testing)
Use this option if you want to test the game directly on your Android phone or share the file with team members.
-
In the Build Profiles window, ensure that Build App Bundle (Google Play) is unselected.
-
Click Build.
-
Choose an output folder for your file (we recommend creating/using a dedicated
Buildfolder inside your project directory).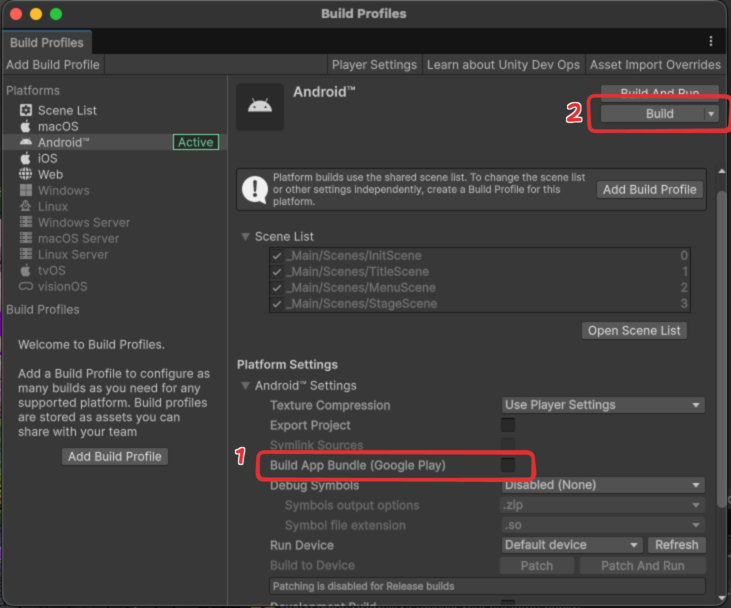
-
Wait for the compilation process to finish. Once completed, your
.apkfile will be generated in the selected folder.
Option B: Building an AAB (For Google Play Store)
Use this option if you are preparing a release to upload to the Google Play Console.
-
In the Build Profiles window, ensure that Build App Bundle (Google Play) is selected.
-
Click Build.
-
Choose an output folder for your file (e.g., the
Buildfolder).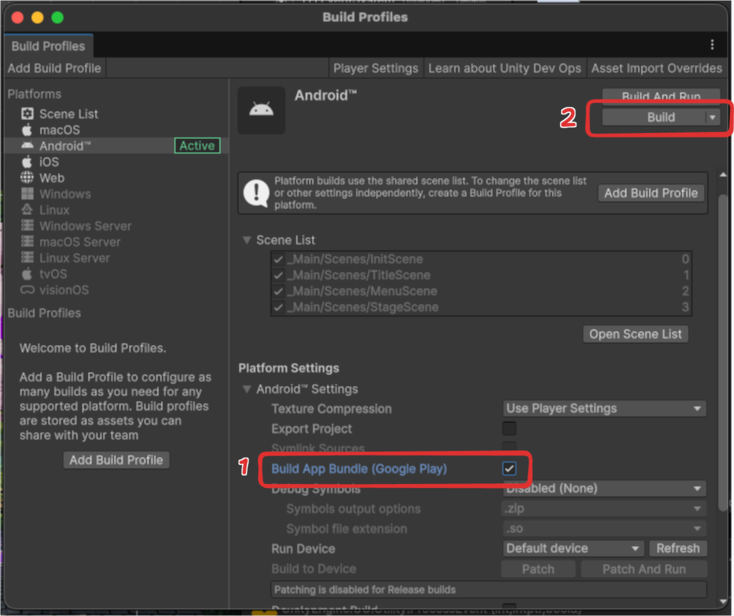
-
Wait for the compilation process to finish. Once completed, your
.aabfile will be generated in the selected folder, ready for store submission!