Dress-Up Systems
The Dress-Up System allows characters to change appearances (hair, outfits, and emotions) dynamically during the game.
Modifying or creating dress-up systems requires basic knowledge of the Unity Editor. You must be comfortable working within the Scene view and manipulating objects in the Hierarchy.
Currently, the Dress-Up system is exclusive to the StageScene.
Asset Structure
To understand how a dress-up character works, you can reference the sample character included in the project. Navigate to:
Assets > _Main > Story > Content > the_christmas_cottage > assets
Here you will find a prefab named You.
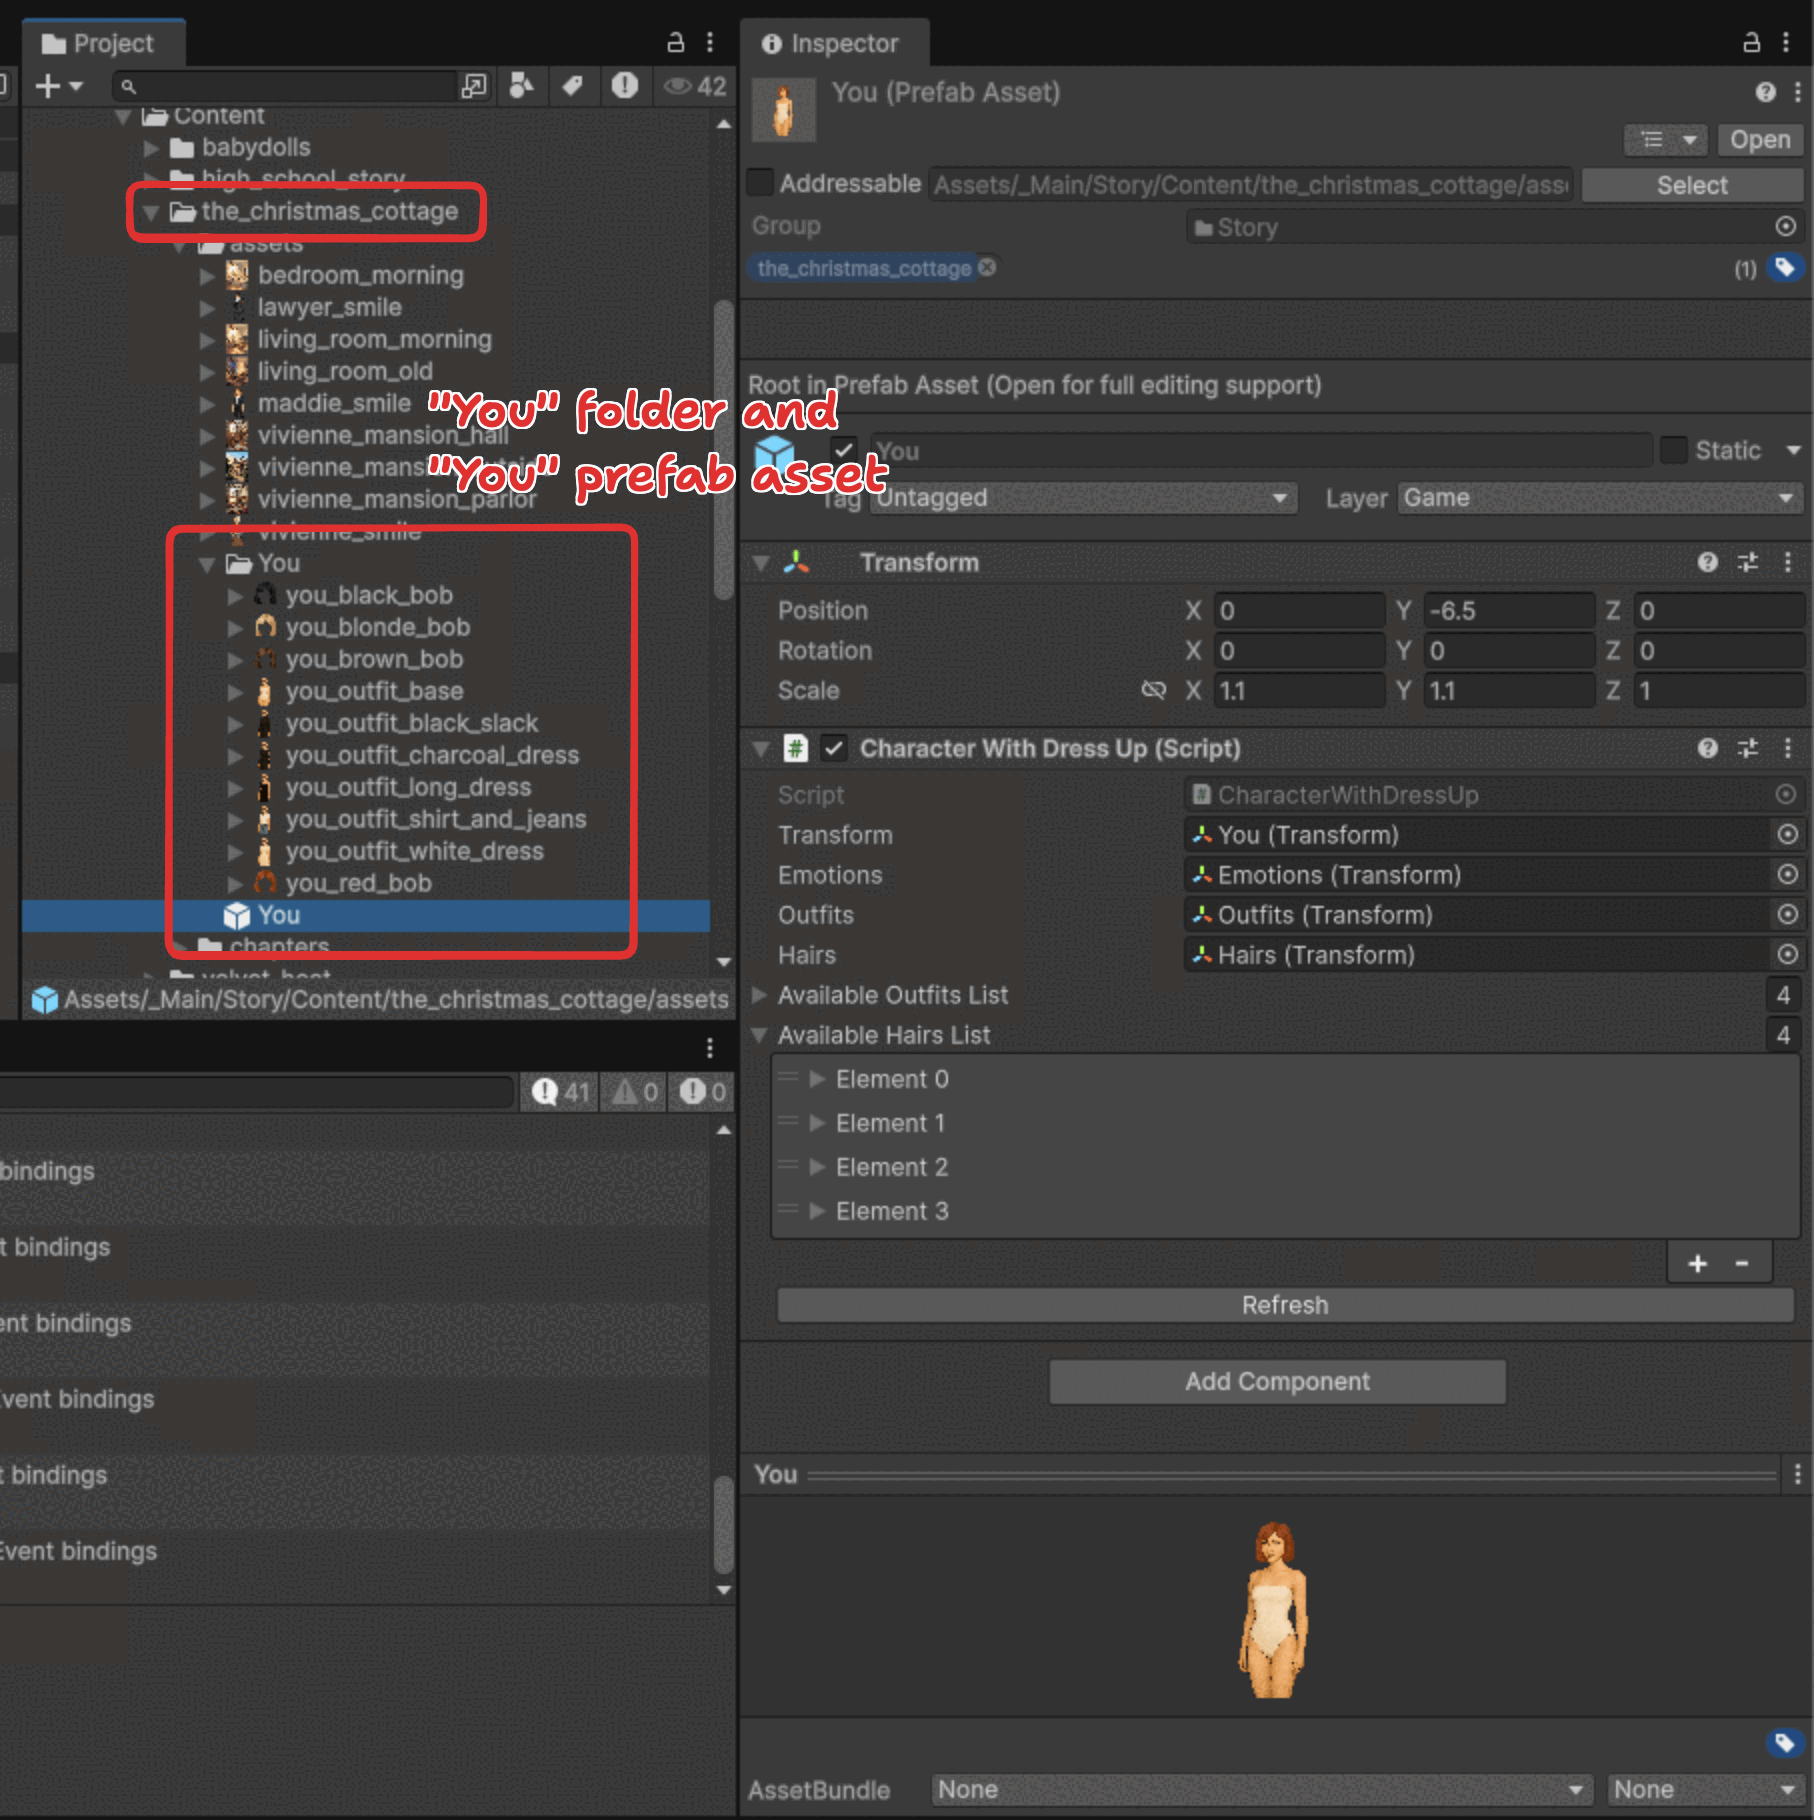
Double-click the You prefab to open it. The character is controlled by two main components:
- Hierarchy: Used to position, scale, and organize character parts.
- Inspector: Used to assign these parts to the
CharacterWithDressUp.csscript so YarnSpinner can read them.
Hierarchy Organization
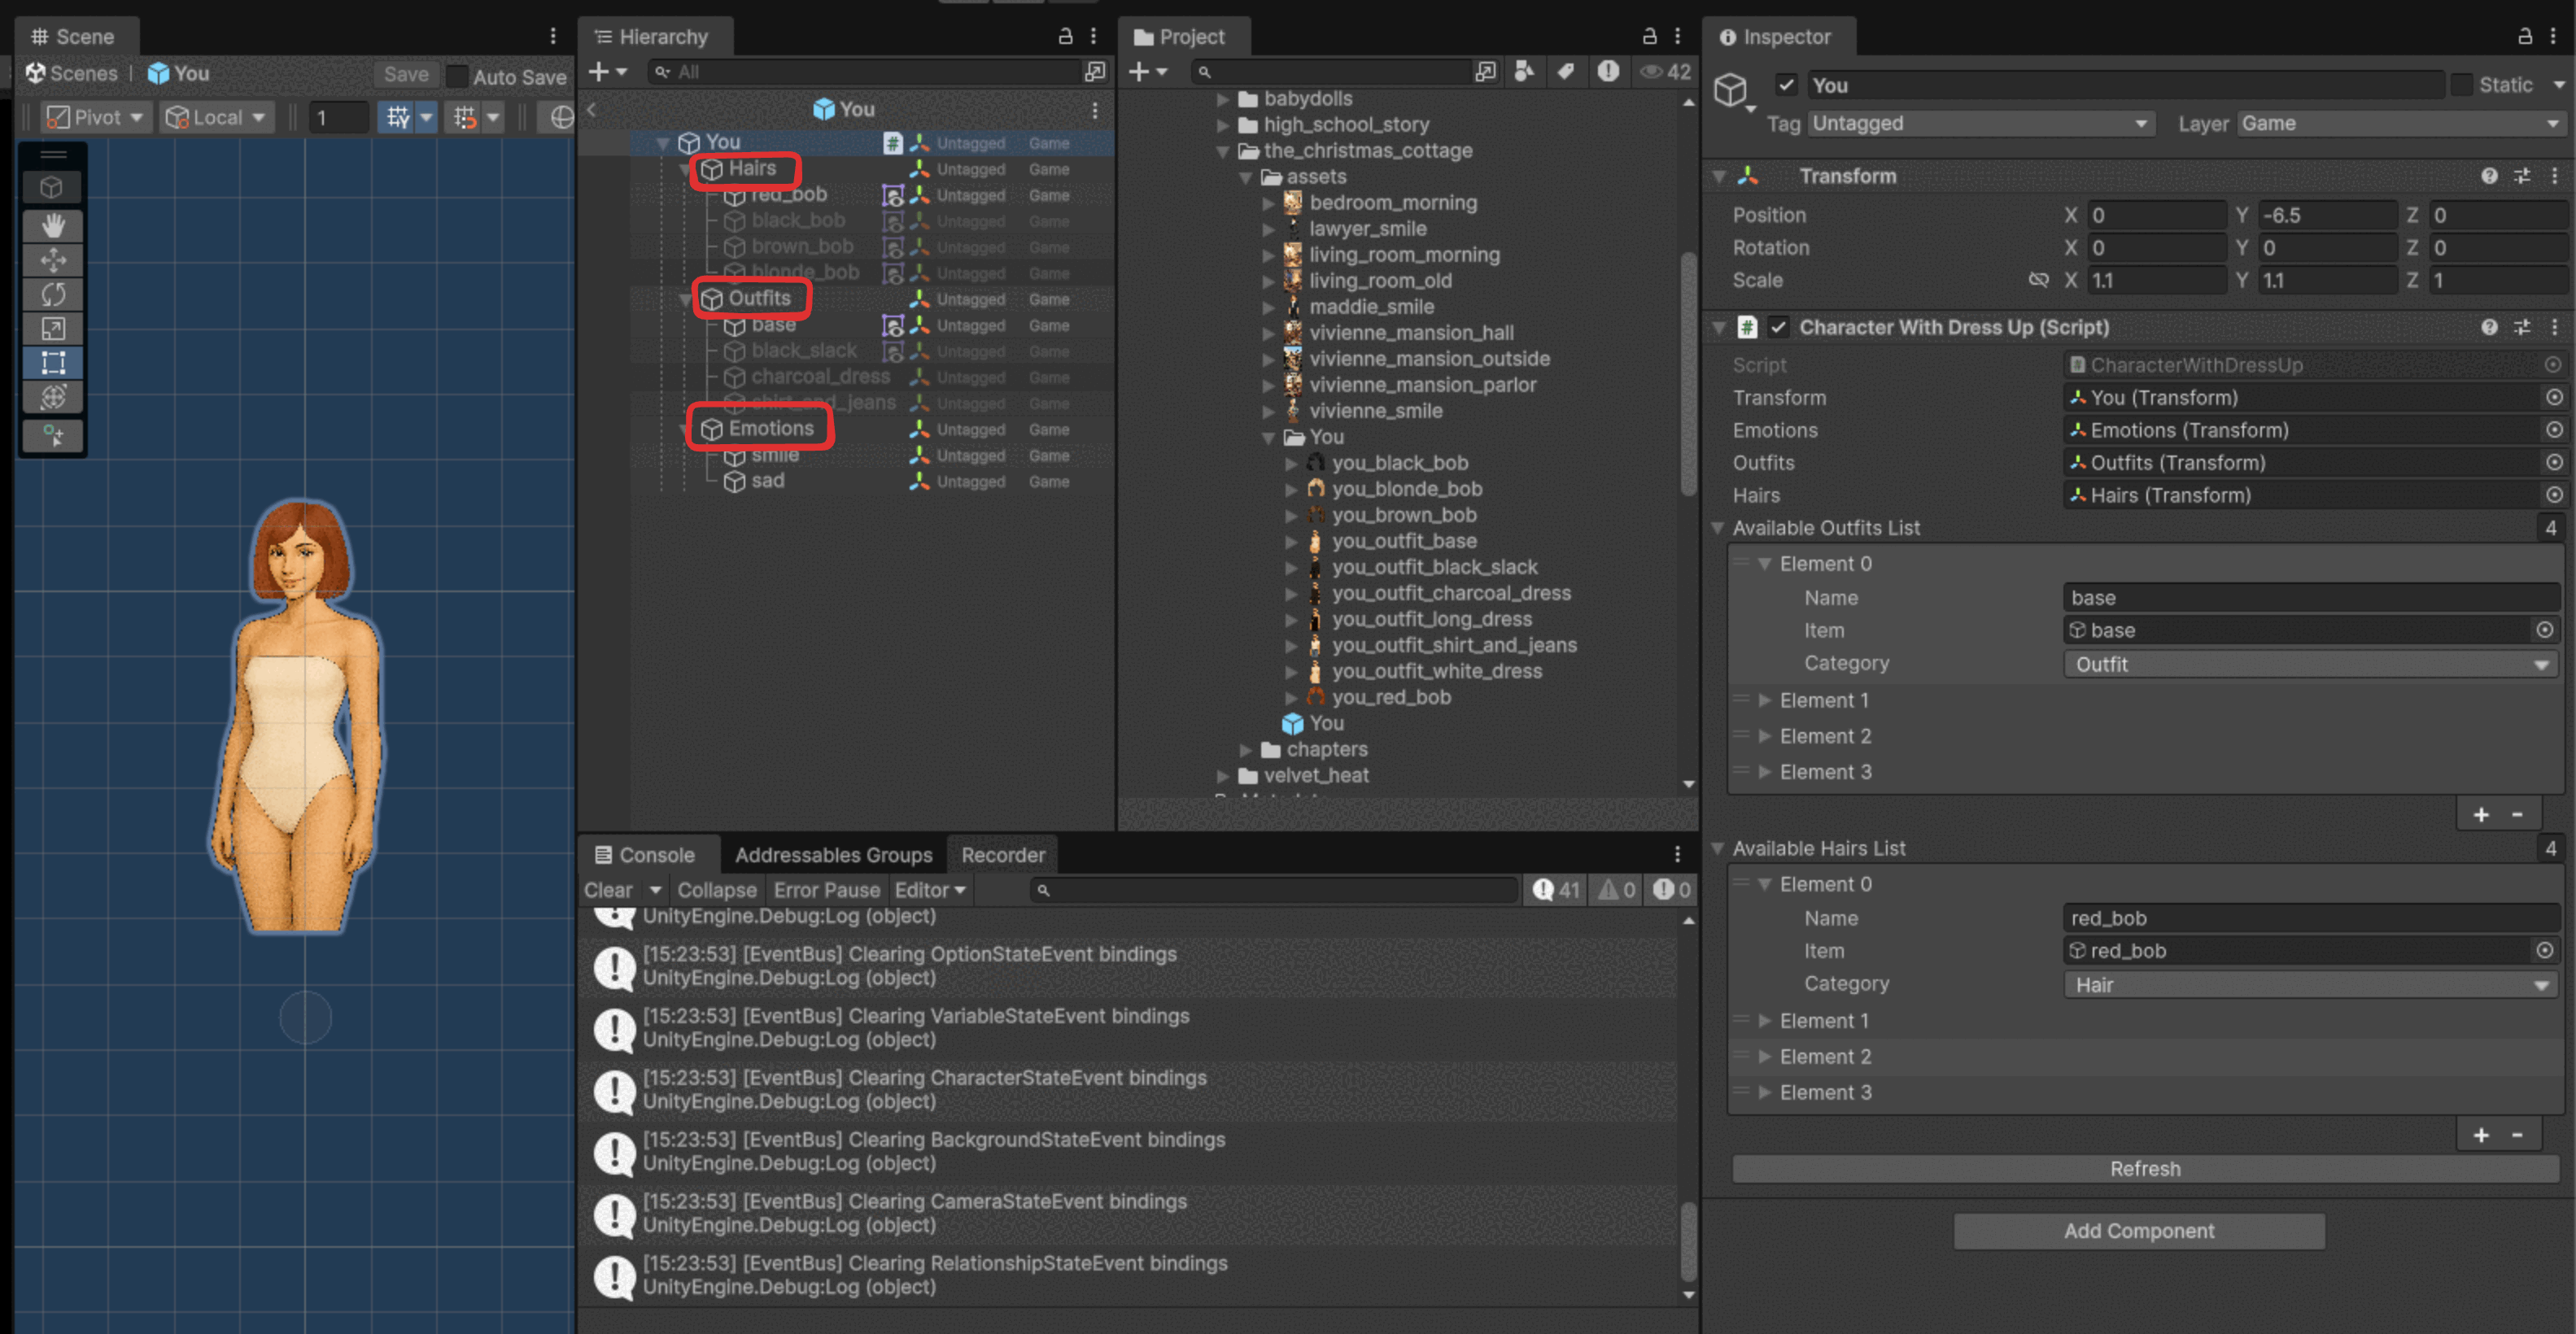
Inside the prefab, the hierarchy is strictly organized into three parent objects. Do not rename these parent objects, as the script references them automatically.
- Hairs: Contains all hair options.
- Outfits: Contains all clothing options.
- Emotions: Contains facial expressions. (Currently supports standard emotions, but will be expanded for complex player expression in the future).
Automatic Configuration
After adding or modifying parts in the Hierarchy, you must update the script.
- Select the root of the character prefab.
- Locate the
CharacterWithDressUpscript in the Inspector. - Click the Refresh button.
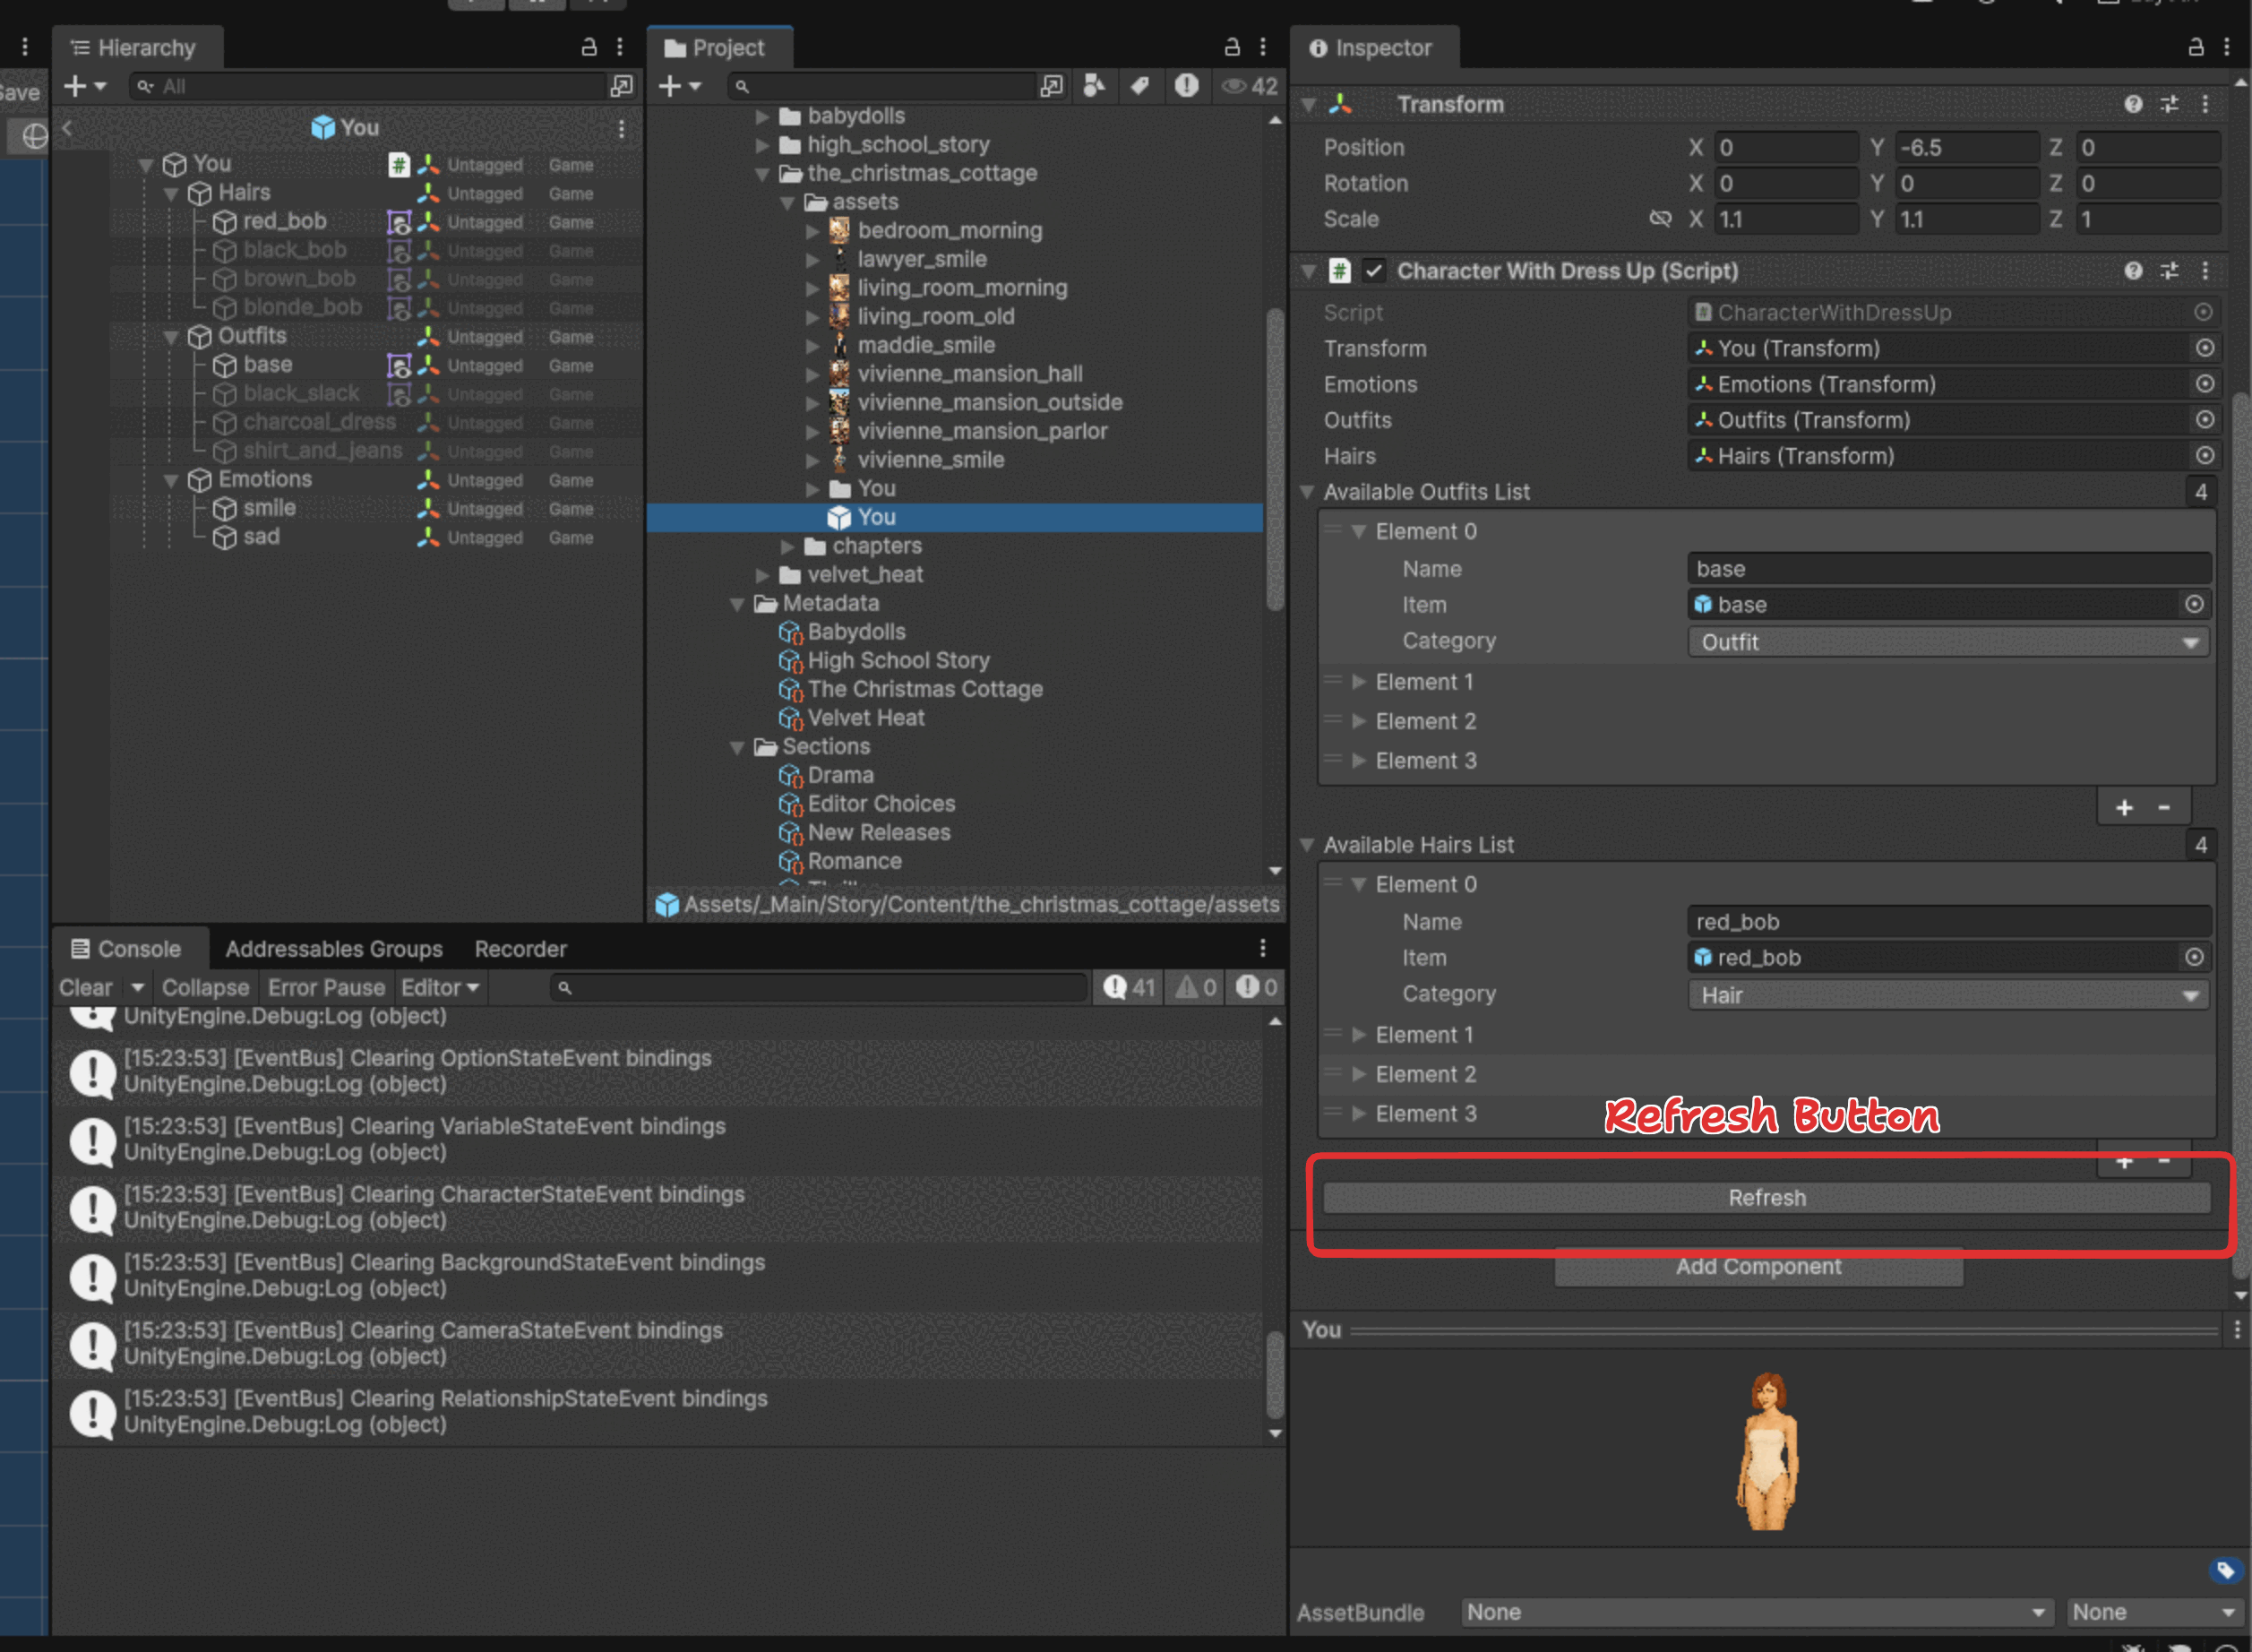
Clicking Refresh automatically assigns all child objects from the Hierarchy to the script. You do not need to drag and drop items manually.
Creating a Dress-Up Character
There are two ways to create a new character: Cloning (Recommended) or Manual Creation.
Method 1: Cloning (Recommended)
This is the safest and fastest method. It ensures all script references and hierarchy structures remain intact.
- Navigate to an existing character (e.g., the
Youprefab inthe_christmas_cottage > assets). - Select the prefab and press
Ctrl + D(Windows) orCmd + D(Mac) to duplicate it.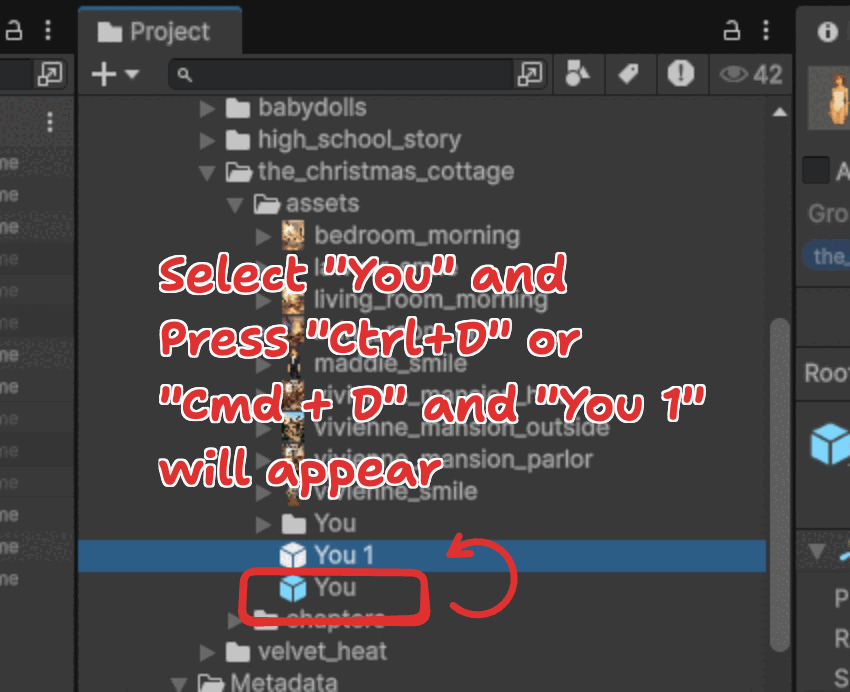
- Rename the new prefab.
- Move it to your desired story folder.
- Open the prefab and replace the sprites in the Hierarchy with your new character art.
- Ensure your art follows the required format shown below.
- Ensure your art follows the required format shown below.
- Important: Click Refresh in the Inspector to update the references.
When naming your hair or outfit parts in the Hierarchy, strictly use snake_case (e.g., party_dress, long_hair). This prevents capitalization errors when typing commands in YarnSpinner.
Method 2: Manual Creation
If you need to build a character from scratch, follow these strict parameters to ensure consistent scaling and positioning.
- Create a new GameObject in
StageScene.scene. - Attach the
CharacterWithDressUpscript. - Manually create the
Hairs,Outfits, andEmotionschild objects. - Assign the correct sprites and ensure the Transform settings match the standard templates.
Standard World Positions: Characters with dress-up systems spawn at specific coordinates. Ensure your setup aligns with these defaults to prevent visual jumping:
| Position | X | Y | Z |
|---|---|---|---|
| Left | -1.25 | -6.5 | 0 |
| Right | 1.25 | -6.5 | 0 |
| Center | 0 | -6.5 | 0 |
Once configured, don't forget to click Refresh and save your object as a prefab in your story's asset folder.
Here is a sample image that shows the character properties while playing a story.
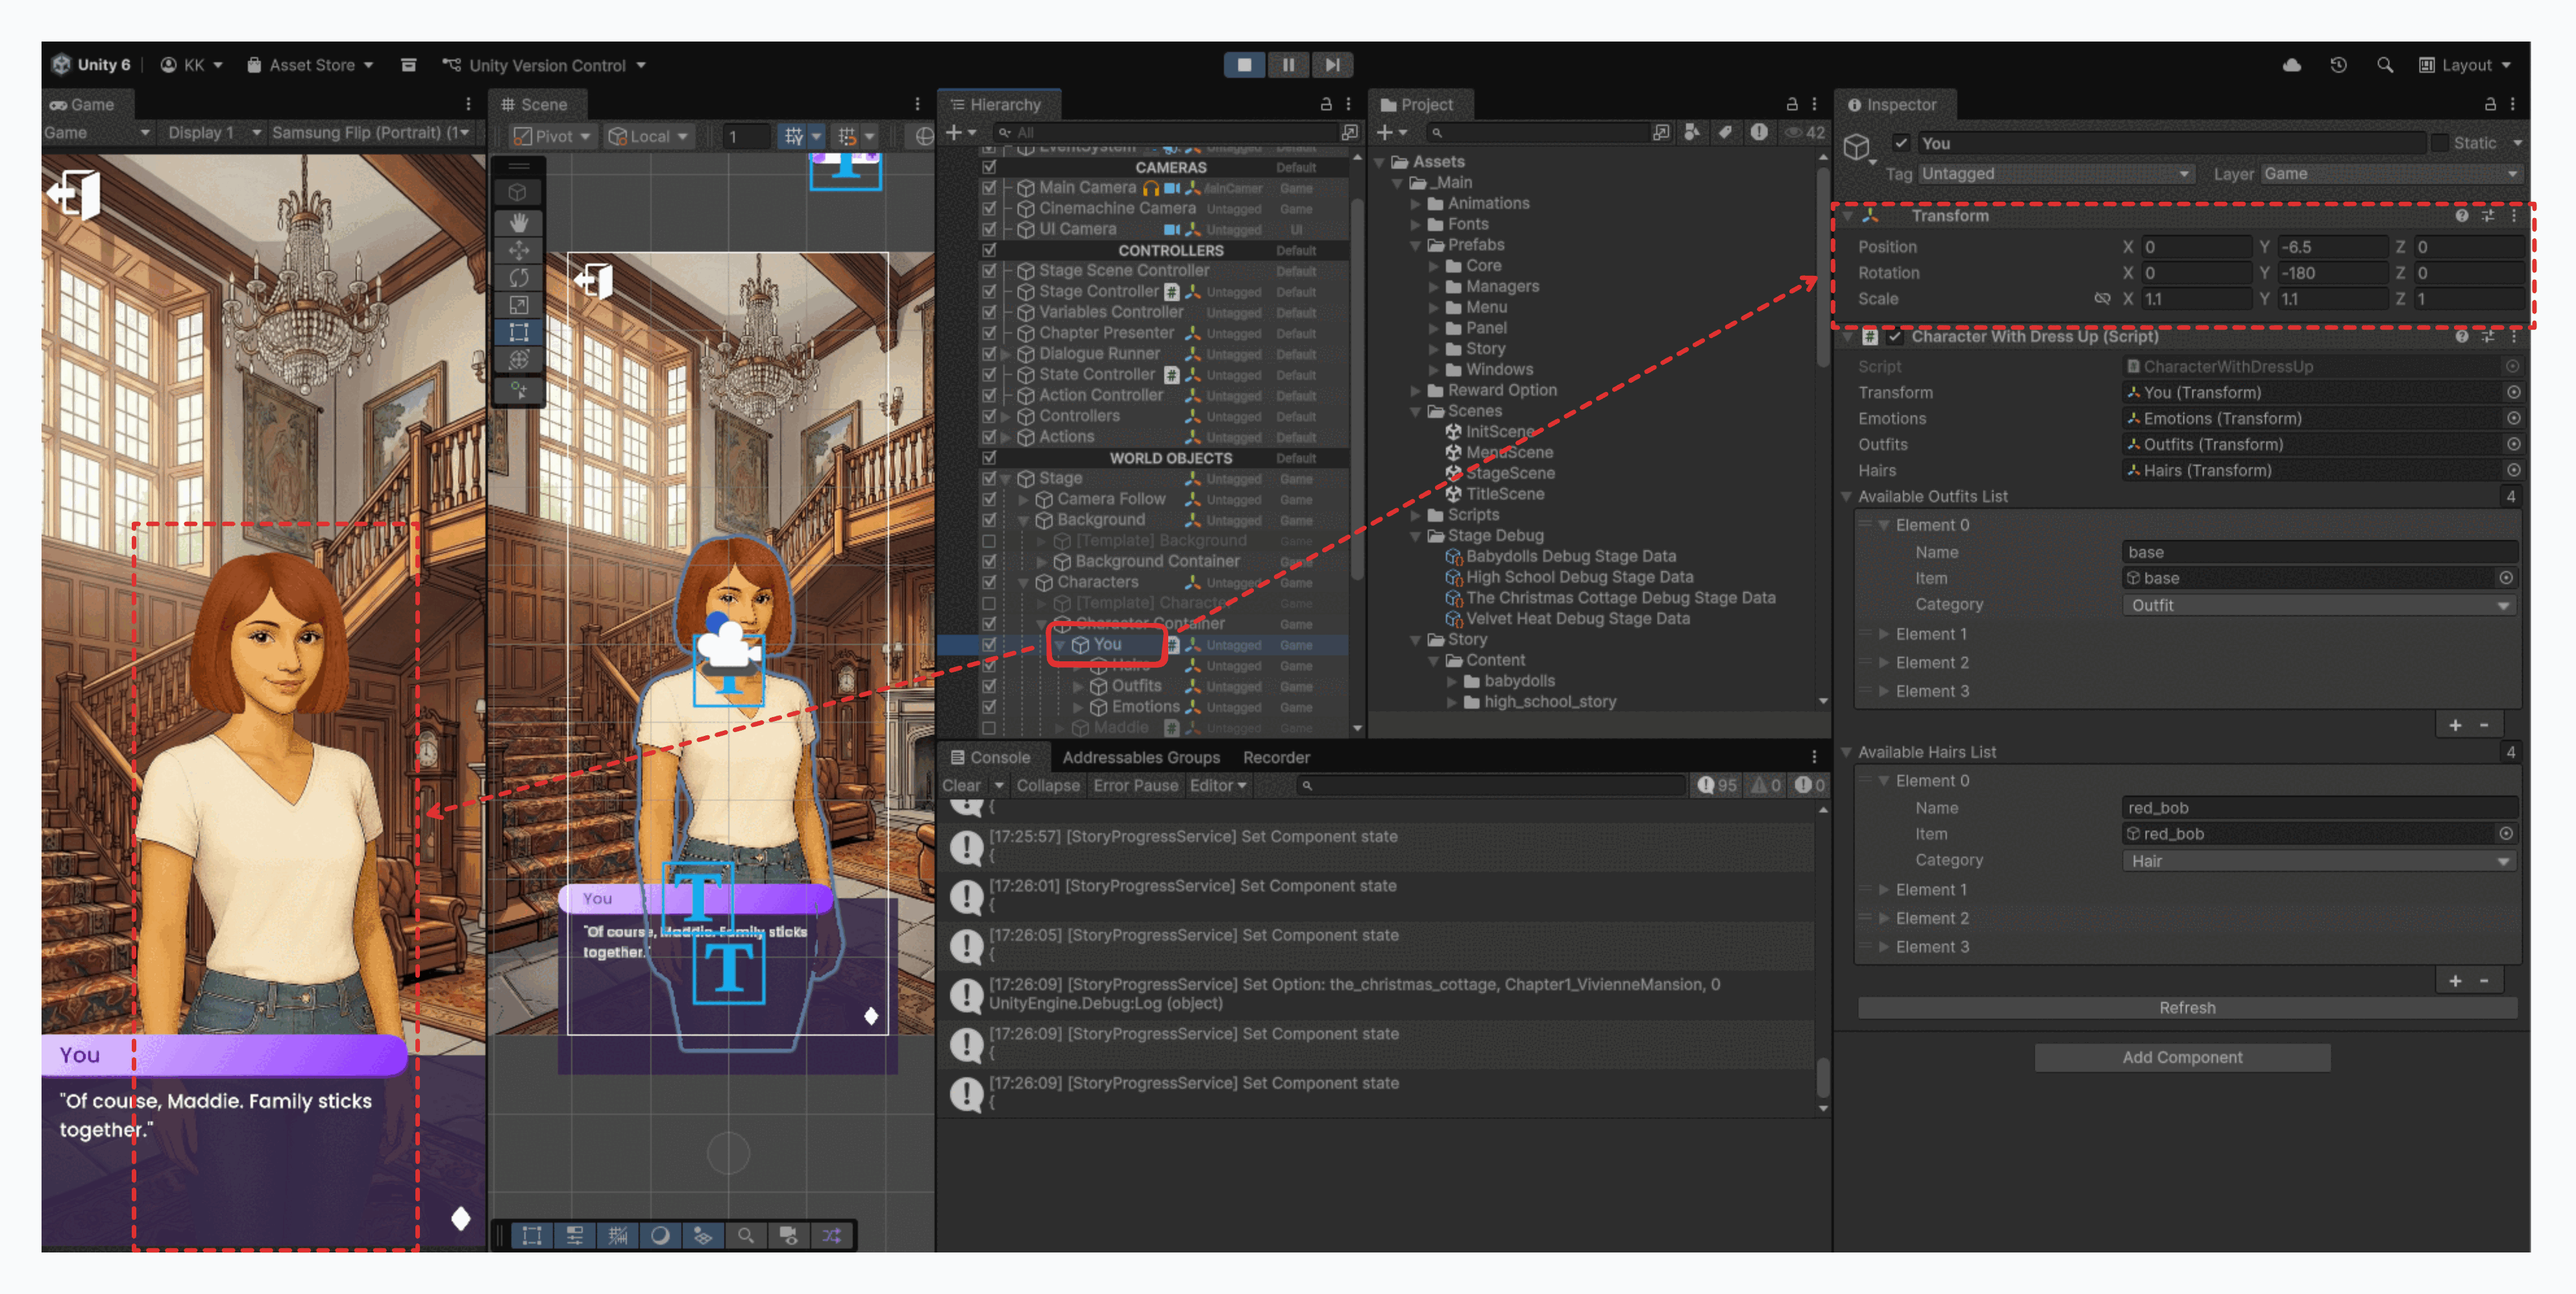
Once your character is set up in Unity, you can control their appearance using Yarn Commands.