Metadata
Metadata files provide the application with essential information about a story, such as its title, description, and the thumbnail image displayed on the story selection menu.
Steps:
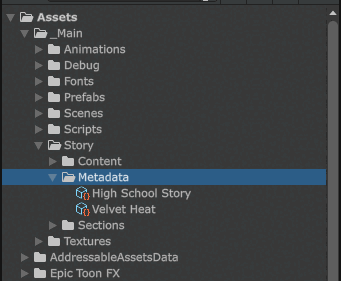
- Navigate to the
Metadatafolder:Assets/_Main/Story/Metadata
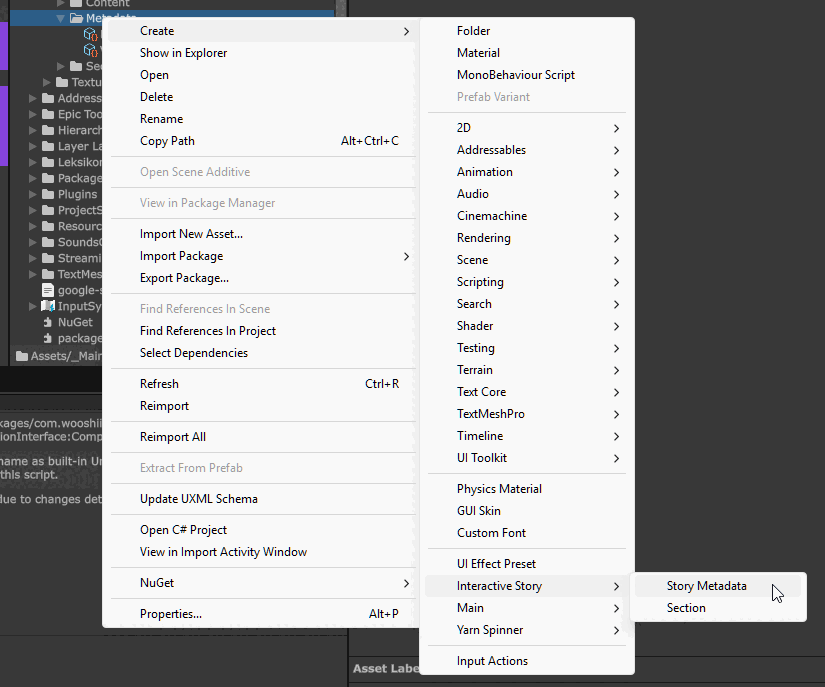
- Right-click the
Metadatafolder and selectCreate > Interactive Story > Story Metadatato create a new metadata asset.
- Select the new metadata asset to view its properties in the
Inspectorpanel.
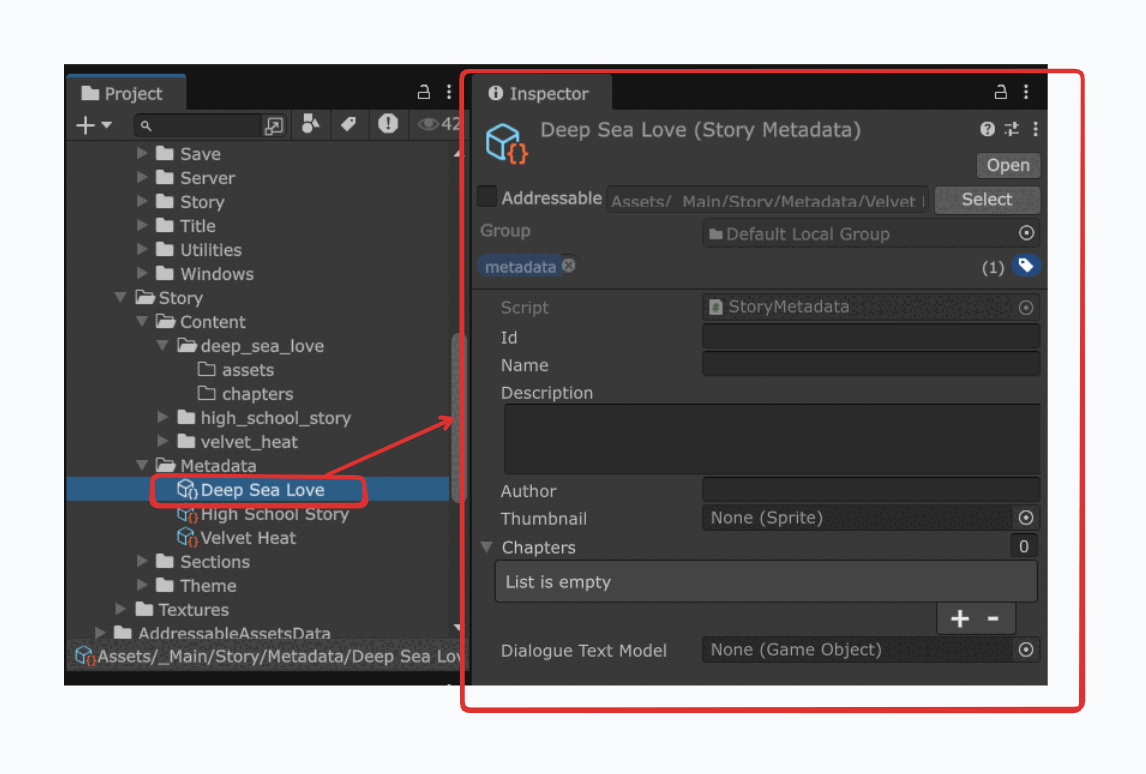
- Fill in the
Idfield. This must be a unique identifier for your story.- Use underscores (
_) instead of spaces. - Examples:
the_lost_treasure,raymond_s_legacy,3_musketeerstipImportant: This
Idmust exactly match the name of your story's content folder (e.g.Assets/_Main/Story/Content/the_lost_treasure). It is case-sensitive.
- Use underscores (
- Fill in the
Namefield with the display title for the story (this is what players will see). - Fill in the
Descriptionfield with a brief summary of the story. - Fill in the
Authorfield with the author's name. - Assign a
Thumbnailimage:- First, import your image (e.g., JPG or PNG) into Unity. A common practice is to drag it into your story's specific asset folder (e.g.,
Assets/_Main/Story/Content/[your_story_id]/assets). - Select the metadata asset again.
- Drag the imported image from the
Projectpanel into theThumbnailfield in theInspector.

- First, import your image (e.g., JPG or PNG) into Unity. A common practice is to drag it into your story's specific asset folder (e.g.,
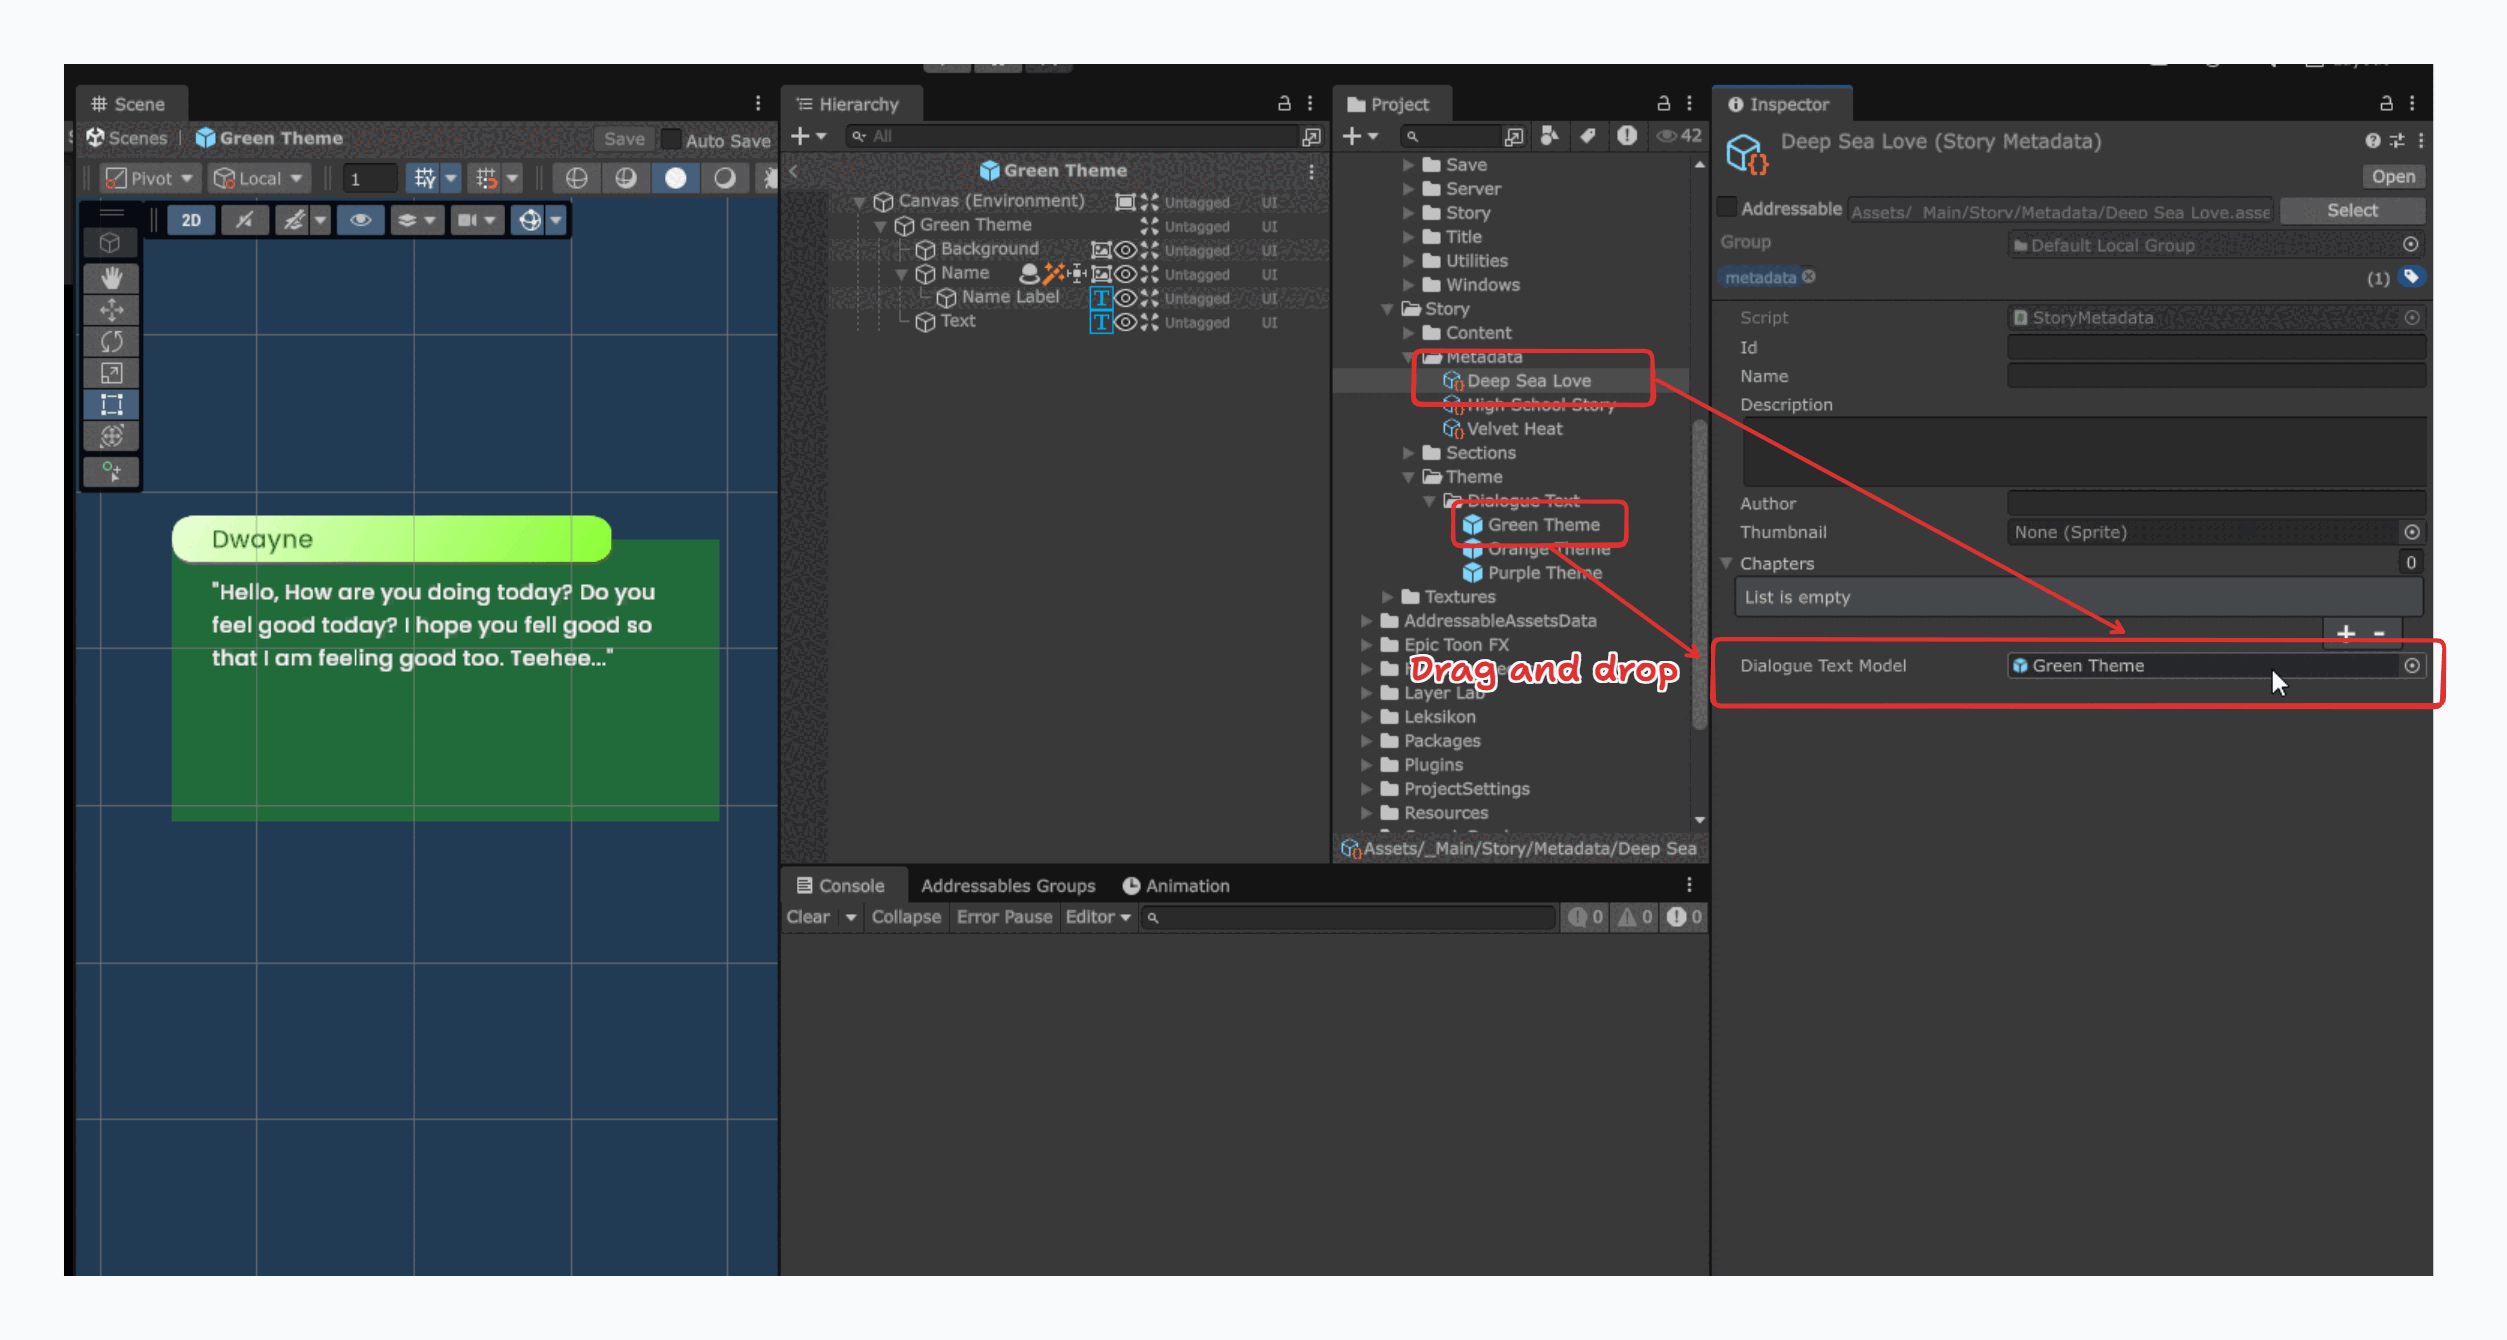
- Assign a
Dialogue Text Modelby dragging a model from theAssets/_Main/Story/Theme/Dialogue Textfolder into this field.
You can also create a custom dialogue text model with a different theme. See Custom Dialogue Text Model for details.
This completed metadata asset allows the story to appear in the main menu where players can browse and select it.
Custom Dialogue Text Model
To create a custom dialogue text model, follow these steps:
- Navigate to
Assets/_Main/Story/Theme/Dialogue Text - Select one of the existing prefabs and duplicate it by pressing
CTRL+D.
For example, you can duplicate theOrange Themeprefab, which will create a new prefab with a numerical suffix.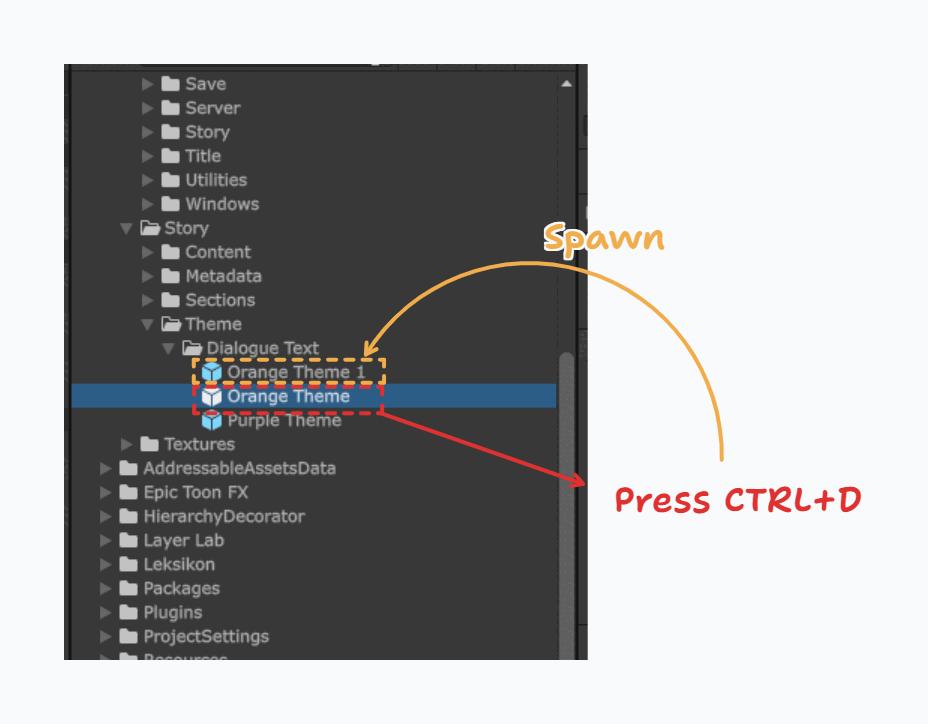
- Rename the duplicated prefab by pressing
F2. - Double-click the new prefab to open it in
Prefab Mode.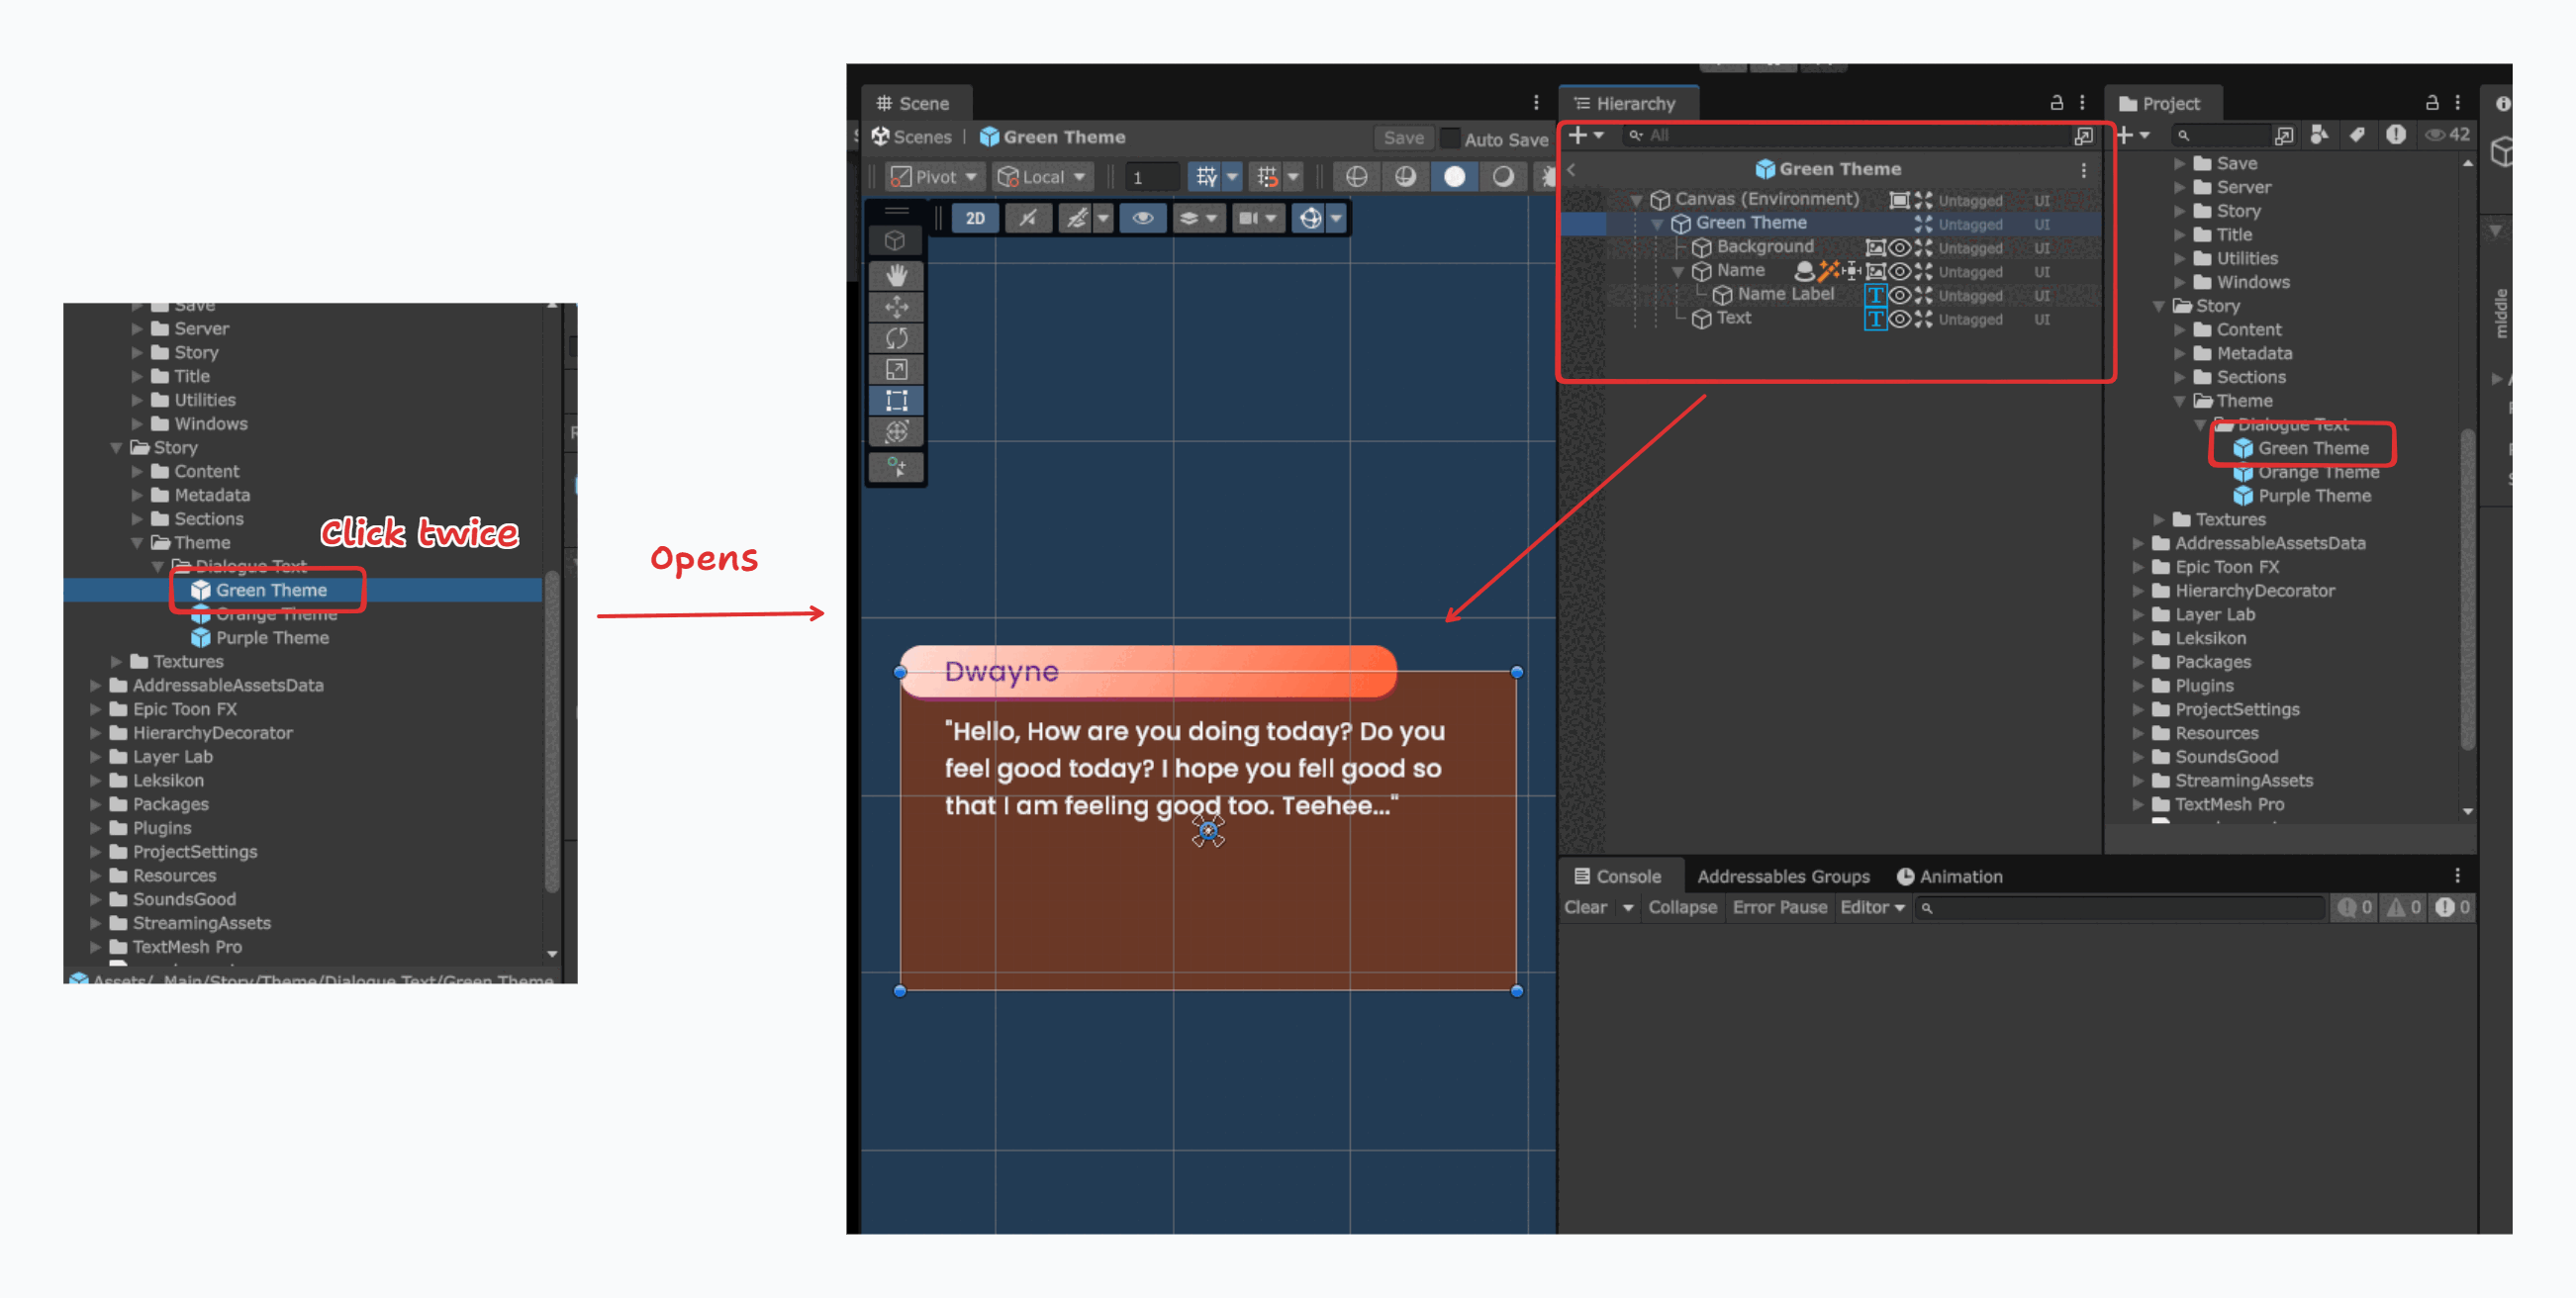
- To update the background color, select the
BackgroundGameObject in the Hierarchy.- In the Inspector, find the
Colorproperty. - Choose your desired color.
- Press
CTRL+Sto save your changes.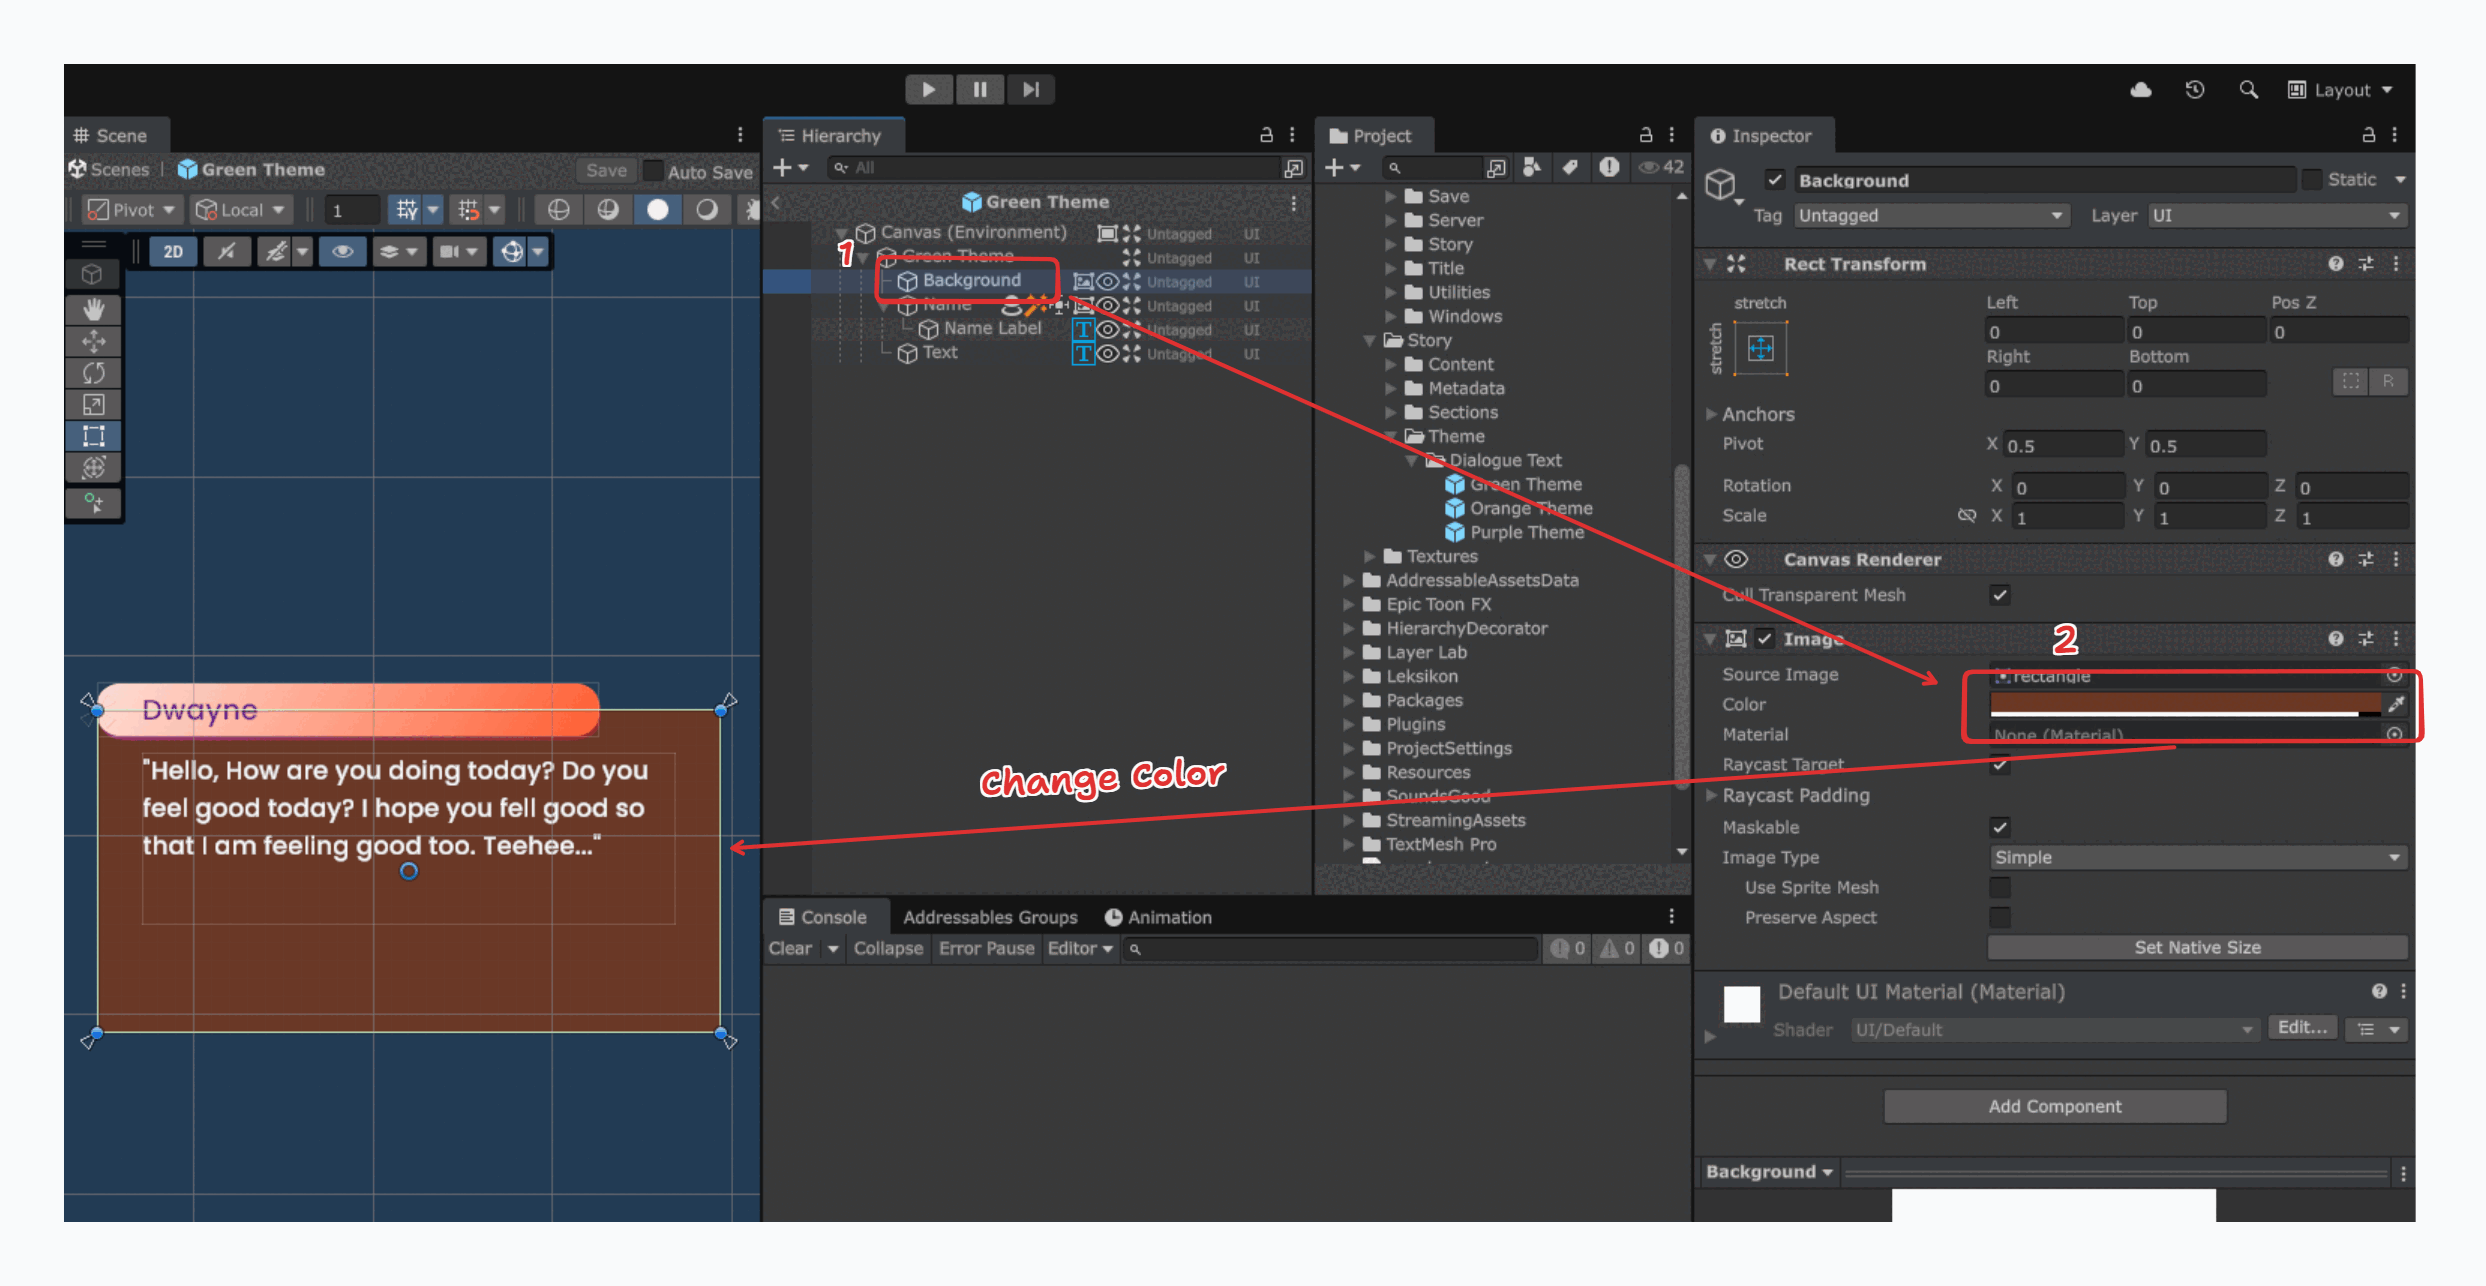
- In the Inspector, find the
- To update the name's background color, select the
NameGameObject in the Hierarchy.- In the Inspector, locate the
UIEffectcomponent. - Expand
Gradation Modeand modify theGradation Gradientcolors. - Press
CTRL+Sto save your changes.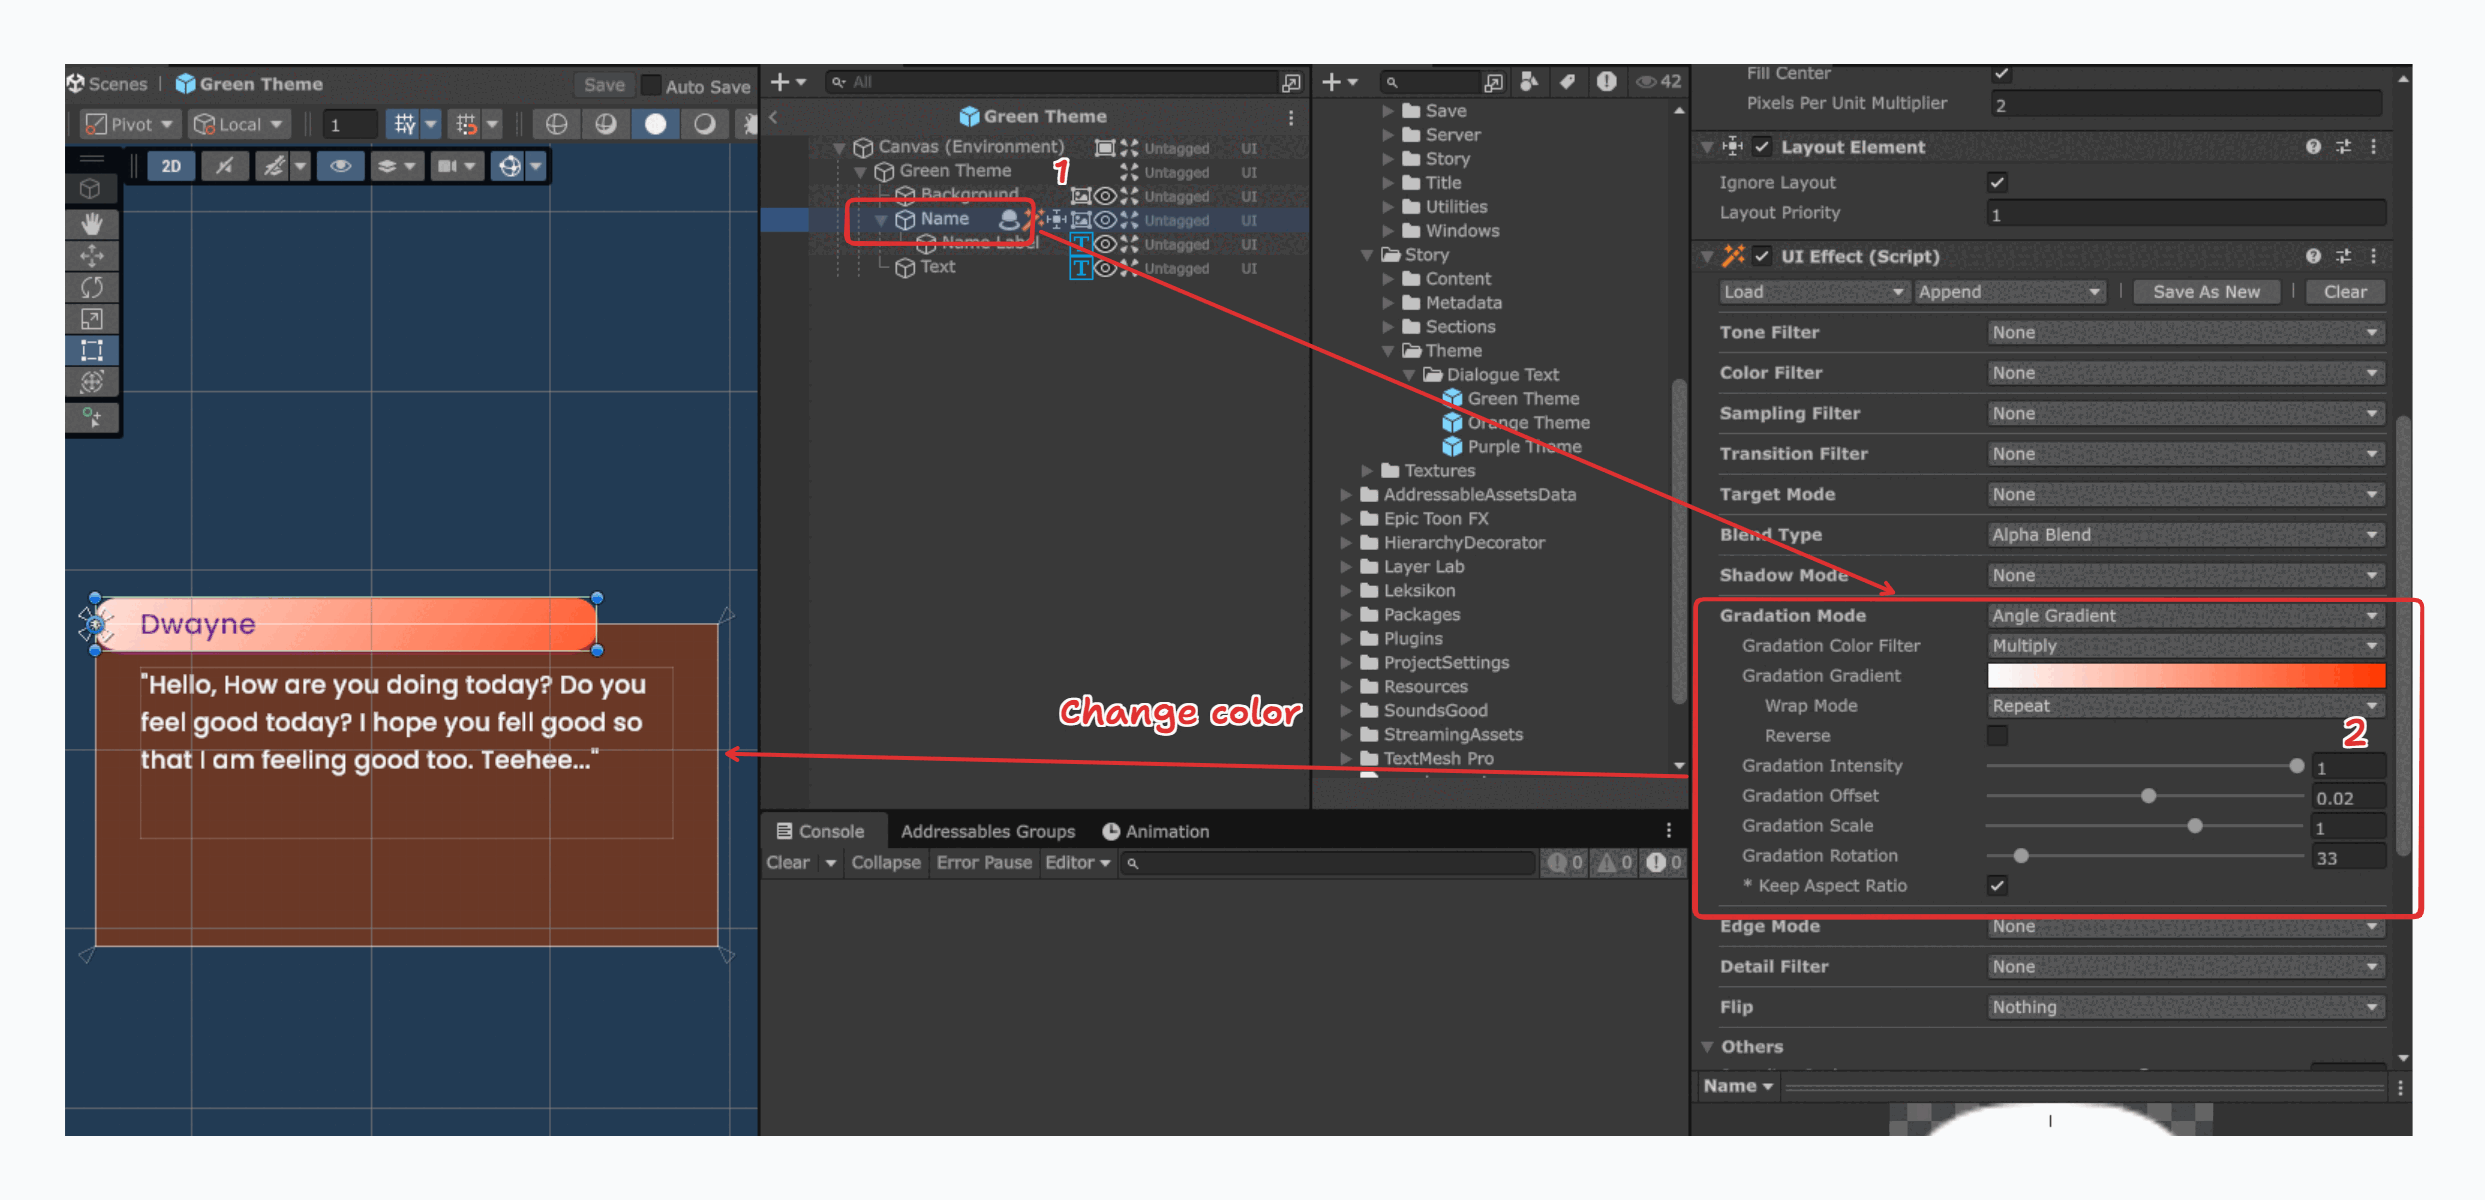
- In the Inspector, locate the
- To update the name text's color, select the
Name LabelGameObject in the Hierarchy.- In the Inspector, find the
TextMeshPro - Text (UI)component. - Locate the
Vertex Colorproperty and modify the color. - Press
CTRL+Sto save your changes.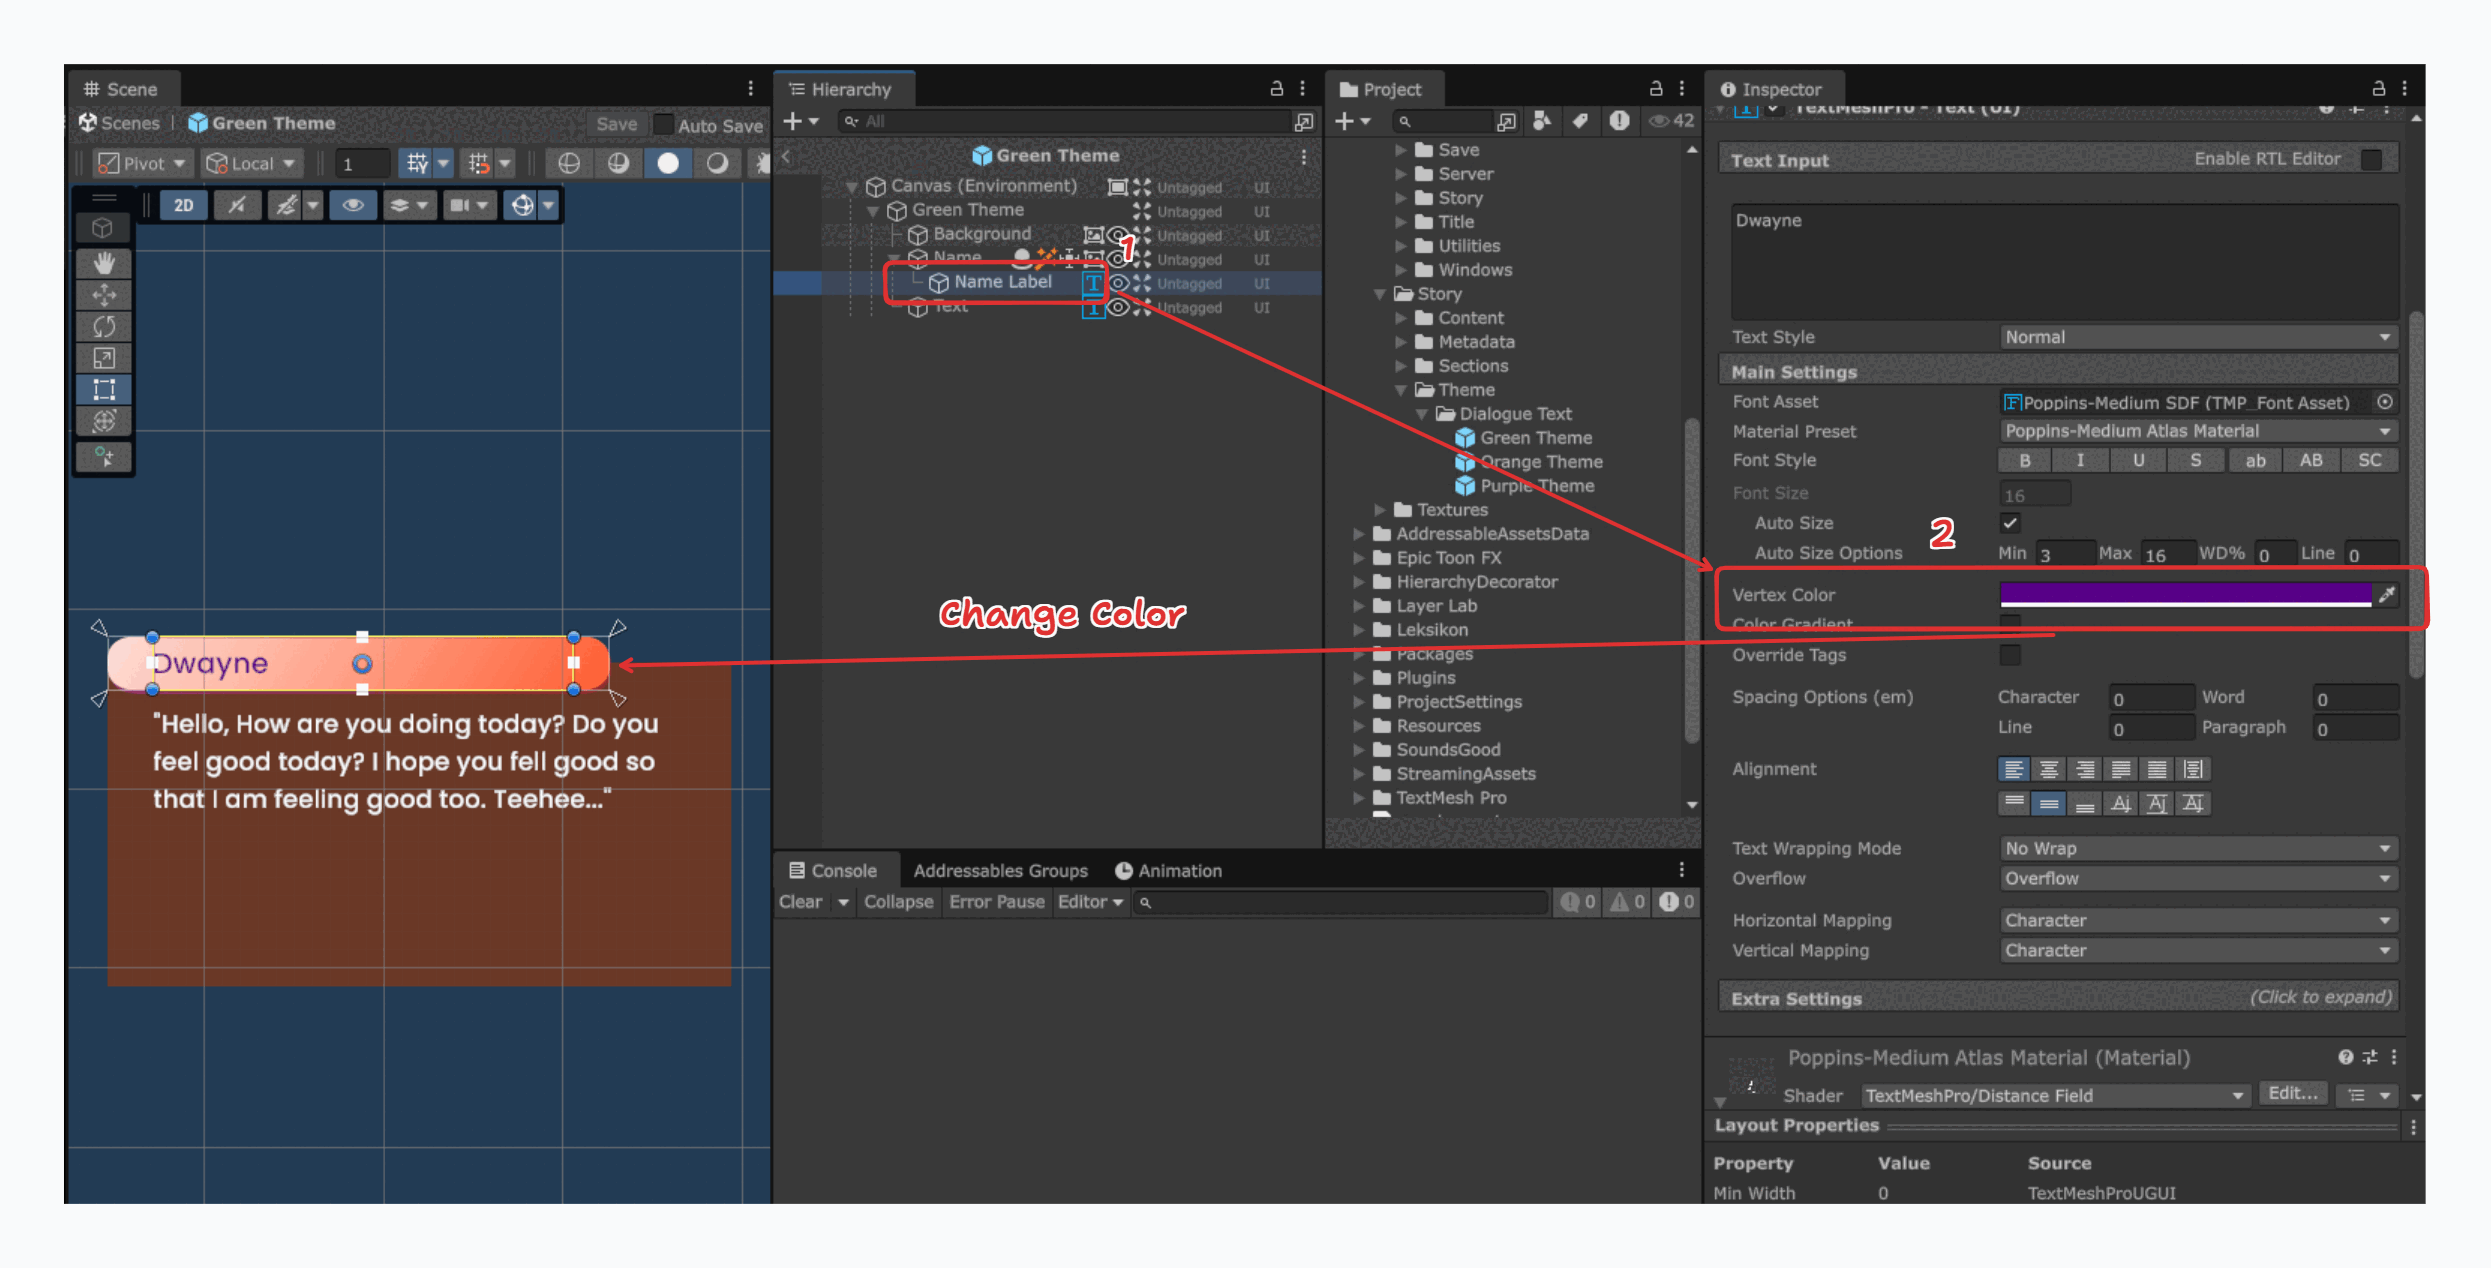
- In the Inspector, find the
- After you finish customizing, you can use the new model by assigning your new prefab to the
Dialogue Text Modelproperty in the Story Metadata.